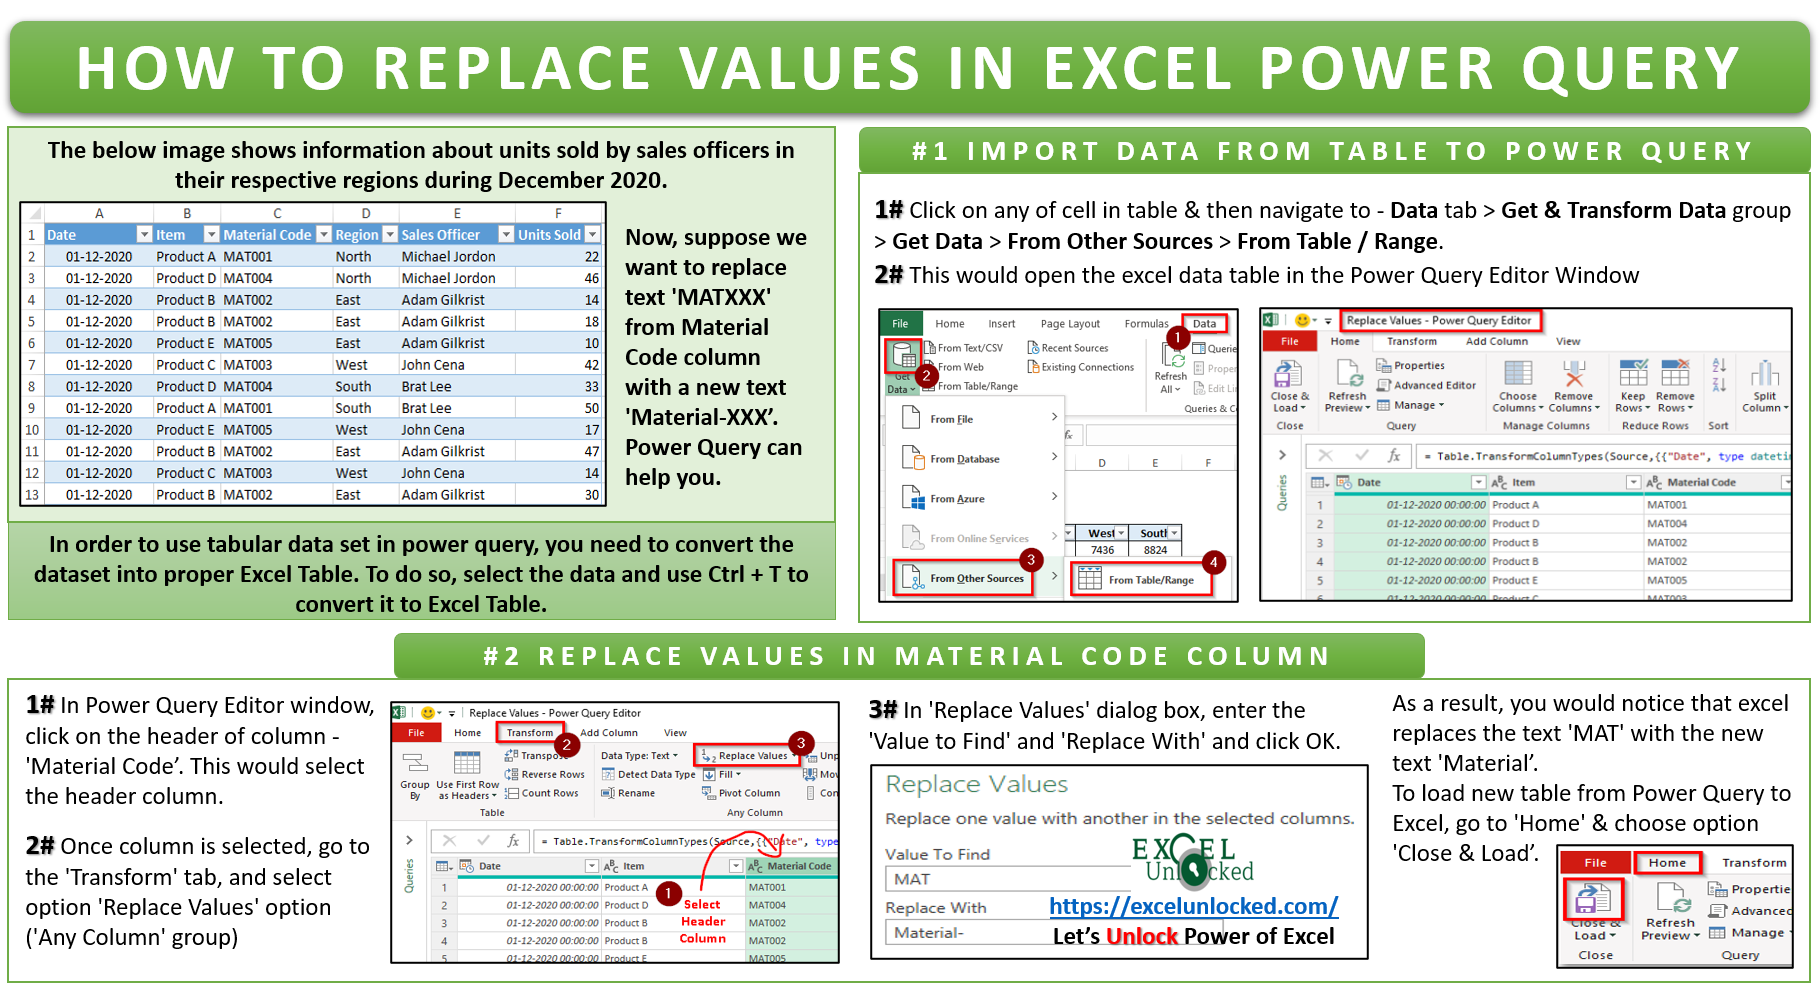
The Power Query Excel feature is one of the amazing Excel features. Using this feature, you can extract data from current excel workbook tables and/or from other external sources into Excel. Additionally, you can play around with the extracted data by applying transformation on this data as per your need. You can find more detail on the basics of power query in our overview blog. On this page, we would learn how to replace values using this amazing power query feature of excel.
So let us begin with unlocking the technique of replacing values in excel using power query. 😉
Are you using Excel 2010 or 2013 version? If yes, then you need to download and install the power query add-in to your excel. It is not available by default. Check this link.
Sample Data – Replace Values in Excel Power Query
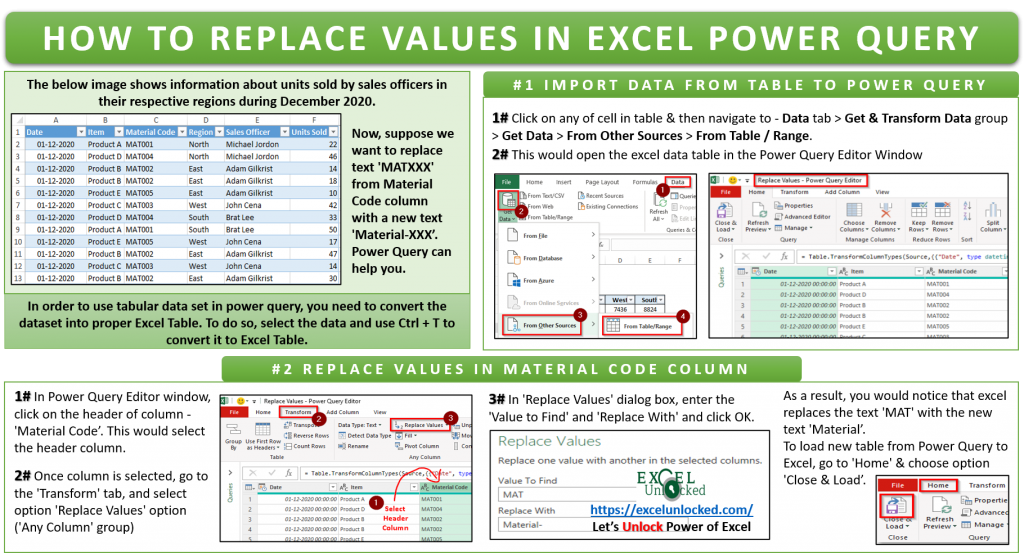
The below image shows the information about units sold by sales officers in their respective regions during December 2020.
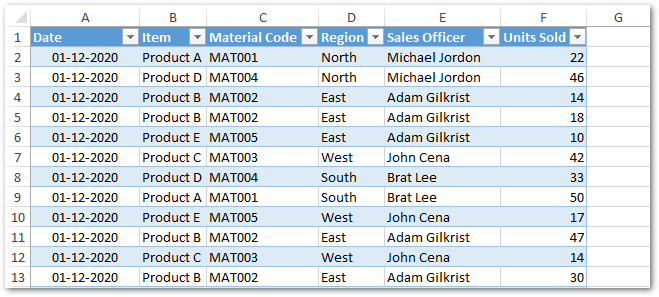
Now, we want to replace the text ‘MATXXX’ from Material Code with a new text ‘Material-XXX’.
To use the excel power query feature on the datasets, it is important to make sure that the dataset is in an excel table format. The power query feature does not work on normal tabular data. You need to convert the normal tabular data into an excel table format. To do so, select the data cell range. Press Ctrl + T and click the button ‘OK’ in the new dialog box ‘Create Table’.
Now, once the normal dataset is converted into an excel table format, we are good to start with learning how to replace the text ‘MATXXX’ with a new text ‘Material-XXX’ in this table.
2 Step Procedure to Replace Values in Power Query
There are two basic steps to replace values in excel power query tool.
- Firstly, to extract the table into Power Query Editor window
- And then, proceed with replacing values.
Let us go further with each of these two steps one by one.
Extract or Import Table Data into Power Query Editor Window
As learned above, in order to work with datasets in power query, it is important that the dataset is in proper excel format, and not just a normal table.
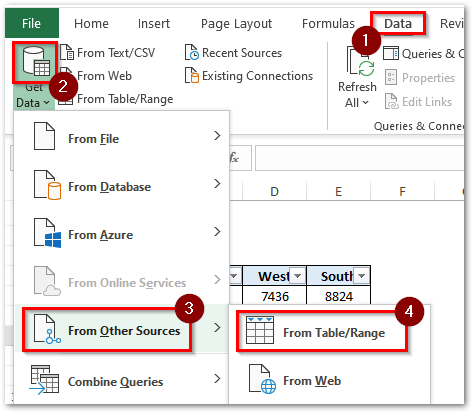
To import the excel table data into power query window, firstly click anywhere on the table. Then, navigate to the path – Data tab > Get & Transform Data group > Get Data > From Other Sources > From Table/Range.
This would open up the ‘Power Query Editor’ window with its default name as the excel table name. You would notice that your table appears in this window.
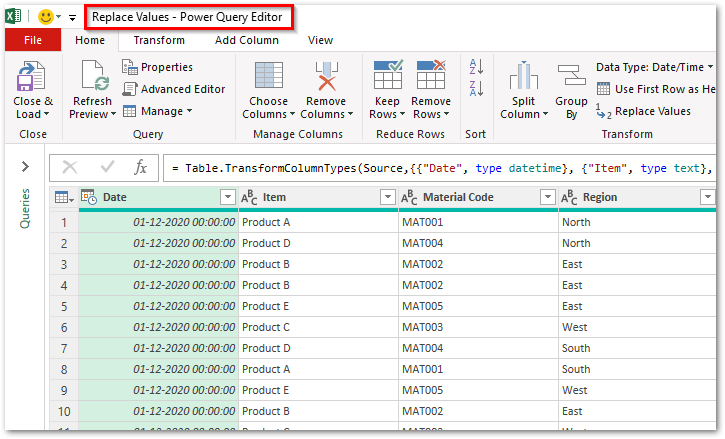
Once the excel table is visible in the power query editor window, let us now unlock the technique to replace the text ‘MATXXX’ with a new text ‘Material-XXX’.
Replacing Values in Power Query Editor Window
Follow the undermentioned steps to replace the text with new text in the power query editor window.
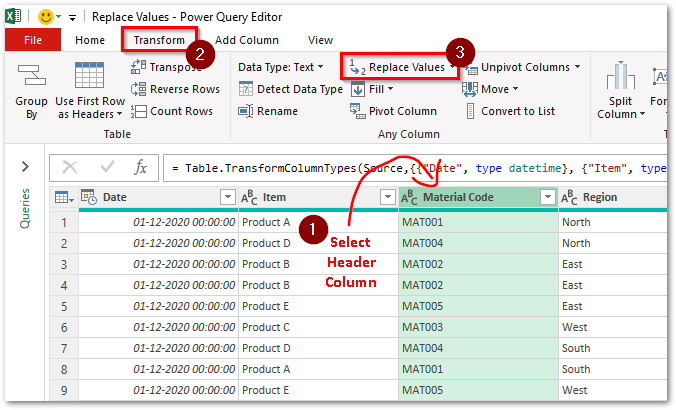
- Click on the header of the column – ‘Material Code’ to select the header column.
- Now, go to the ‘Transform’ tab, and select the ‘Replace Values’ option under ‘Any Column’ group, as highlighted below:
- In the ‘Replace Values’ dialog box that appears, enter the ‘Value to Find’ and ‘Replace With’ input boxes and click OK. See the image below.
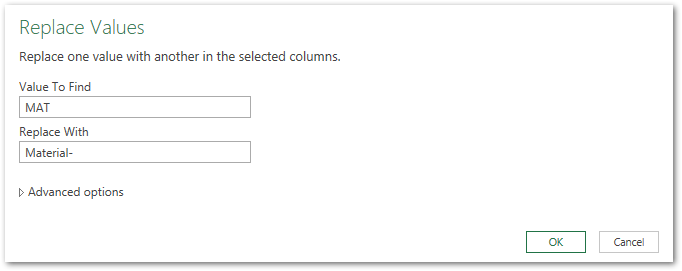
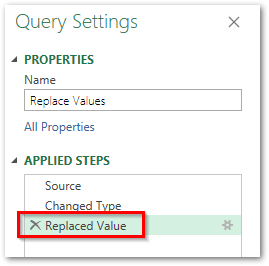
As a result, you would notice that excel replaces the text ‘MAT’ with the new text ‘Material’. Check the ‘Applied Steps’ section. The new step gets added at the end, as shown in the image below.
Finally, to load the new data from the Power Query Editor window back to the excel workbook, simply go to the ‘Home’ tab and choose the option ‘Close & Load’, as shown below:
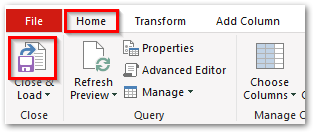
As a result, excel would load the new table with replaced values to a new worksheet in the existing workbook.
Question That May Arise In Your Mind
You might be wondering, why are we using the power query tool to replace values when we can do it directly in the original table itself by using the ‘Excel Find and Replace‘ dialog box.
There is a simple answer to this.
The Power Query Editor window is not just used to extract and transform the dataset, but also to store the transformation steps and create connections for the applied steps.
While replacing values in power query editor window, the excel stored what we did, like this.

Now, suppose there is some change in the source excel table or there are new entries added below the source table.
To quickly get the transformed version of this new data to excel, the stored connection would be helpful. There is no need of performing the above-learned steps again.
Let us test this by making some changes to the source table.
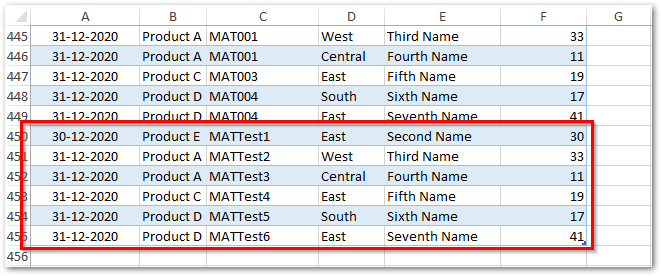
For illustration purpose, I have added some new rows of data to the source table, like the way shown in the image below. Material Code name kept as ‘MATTestX’.
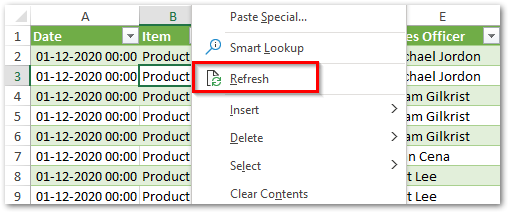
Now, to get the transformed versions of these new rows of data, simply go to the worksheet containing the new table (that we just created using the power query). Right-click anywhere on the new table and then choose the option ‘Refresh‘.
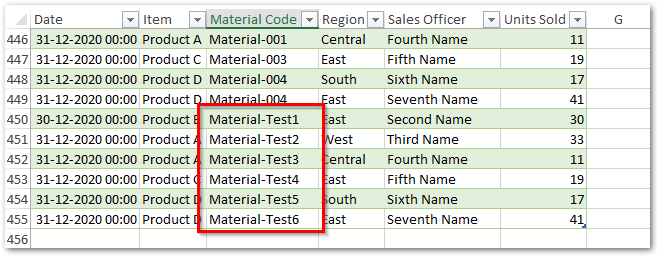
On refresh, excel performs the saved steps on the new updated source table and extract the latest data with replaced values. There was no need of performing the above-learned steps again and again.
With this, we have completed this tutorial on How to replace text with other text using power query excel feature.

