In the previous article, we learned about how to make dynamic named ranges with the help of the OFFSET function. The disadvantage of the OFFSET function is that it is a volatile function. It makes the performance to be slow and we cannot use that method for worksheets containing large amounts of data.
So we would learn about making dynamic named ranges with the help of the INDEX formula.
What is Dynamic Named Range?
We are already familiar with the Static named ranges. The static named range does not update itself automatically, whenever we add or delete a range of cells to the existing data. We need to manually update the named range to reflect the changes.
On the other hand, dynamic named ranges automatically update themselves whenever new data is added or removed. We would use the INDEX function to create dynamic named ranges in excel.
Syntax – One-Dimensional Dynamic Range
In this part, we are explaining the syntax required to make a one-dimensional dynamic range. This implies that the range can only expand or shrink row-wise. The columns are made to be fixed and the range would be static column-wise.
Also Read: Dynamic Named Range – OFFSET and COUNTA
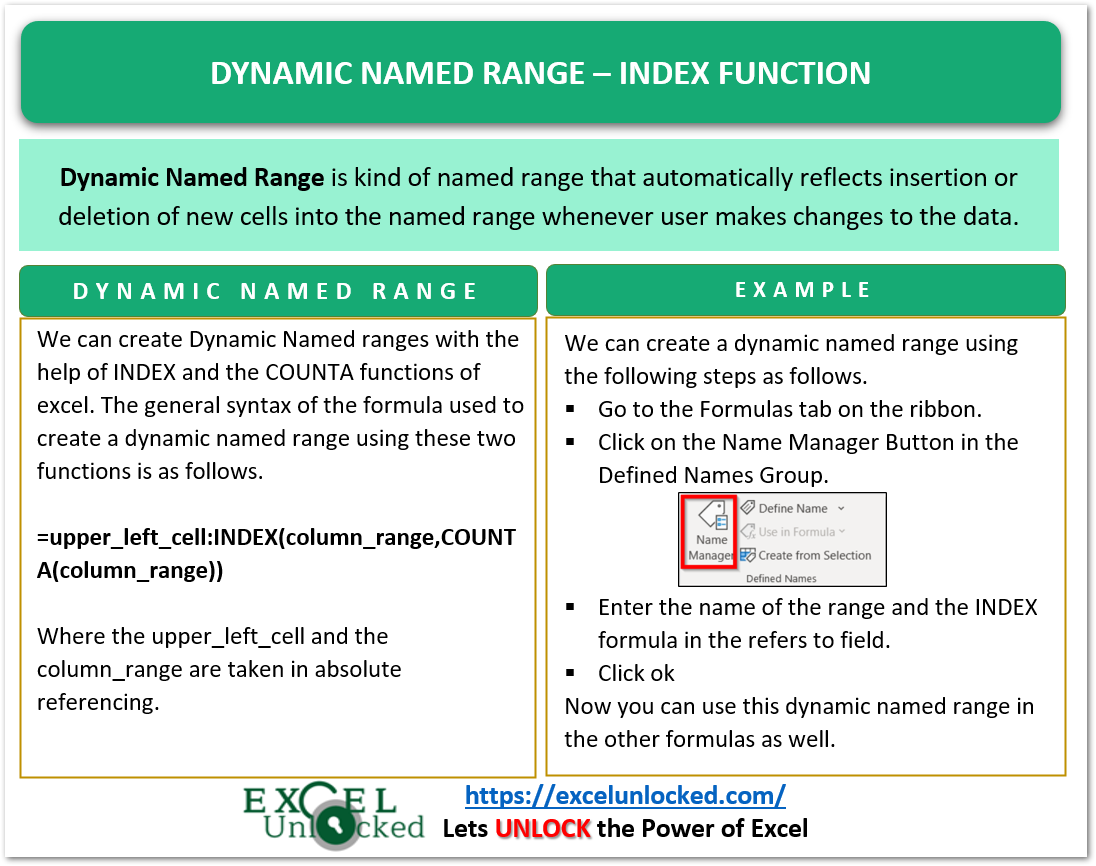
We would use the following formula syntax to create a dynamic named range with the help of the INDEX formula.
=upper_left_cell:INDEX(column_range,COUNTA(column_range))
Here, the following points define the required function arguments.
- upper_left_cell – This is the first cell of the dynamic named range which is the top left cell that remains the same even if the data is added or removed from the bottom or right of the dynamic named range.
- column_range – This is the ending column in the dynamic named range.
Note that we use absolute referencing in the arguments.
Explanation – in the given syntax, we have divided the named range into two parts as explained below.
- The upper left cell is fixed for the dynamic range. It wouldn’t change even if the data is added at the bottom of the range.
- The lower right cell is made to be dynamic with the help of the INDEX formula. In the INDEX formula, the array is supplied as the fixed column to the right of the named range. The COUNTA function would count the total number of nonempty rows. As a result, the INDEX formula would return a reference to the bottom right cell that would make the named range dynamic.
Example – One Dimensional Dynamic Named Range
A One Dimensional dynamic named range is used when we have a fixed number of columns and we need to add or delete the records from the range in the future which would make it work dynamically row-wise.
Let us say we have an employee database as follows.
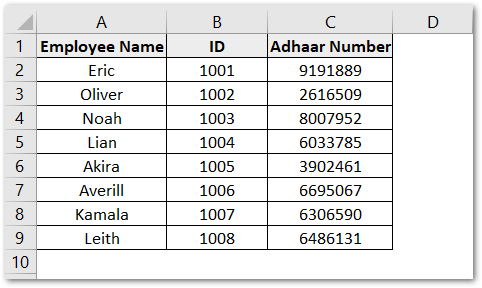
We want to make a named range from this data so that it expands or shrinks automatically whenever a new employee record is added or an existing employee record is deleted from this database.
Therefore, to make such a dynamic named range, follow these steps.
- Press the Ctrl F3 key or click on the Name Manager button in the Formulas tab on the ribbon.
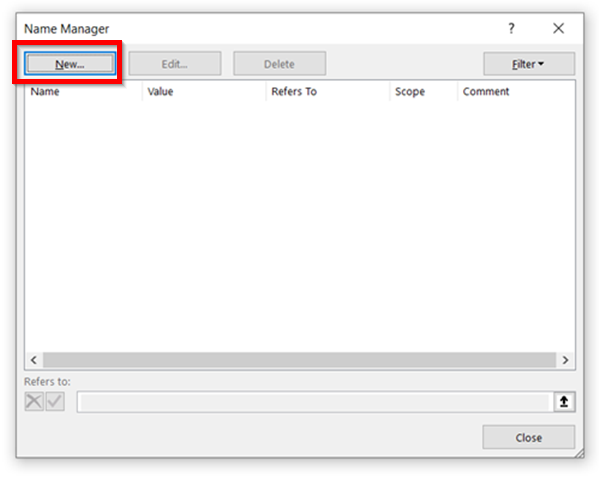
- This opens the Name Manager dialog box. Click on the New button to make a new named range.
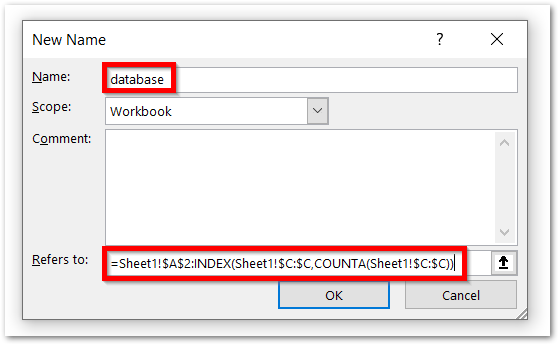
- Enter the name of the range as “database” and in the refer to field, use the following formula.
=Sheet1!$A$2:INDEX($C:$C,COUNTA($C:$C))
- Click Ok.
Working of Dynamic Named Range
This creates a dynamic named range. You can check it:-
- Press Ctrl F3 keys together. Select the named range database from the list and click on the Edit button. Move your cursor to the Refer to the field. This would highlight the newly created dynamic named range on worksheet sheet 1.
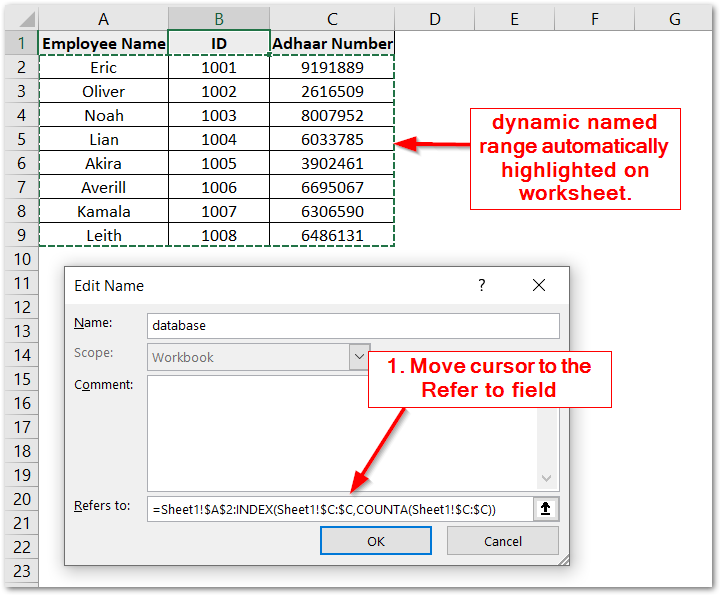
- Press the Escape key twice to exit the Name Manager dialog box.
- We are now adding two new records in the database at the bottom.
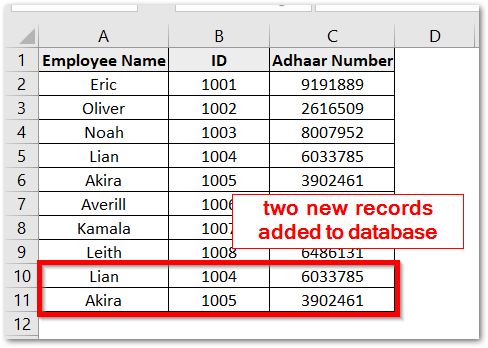
- Now when you repeat step 1, you will see through the Edit Name Dialog box. that the named range has already expanded to A2:C11 and included the two new records.
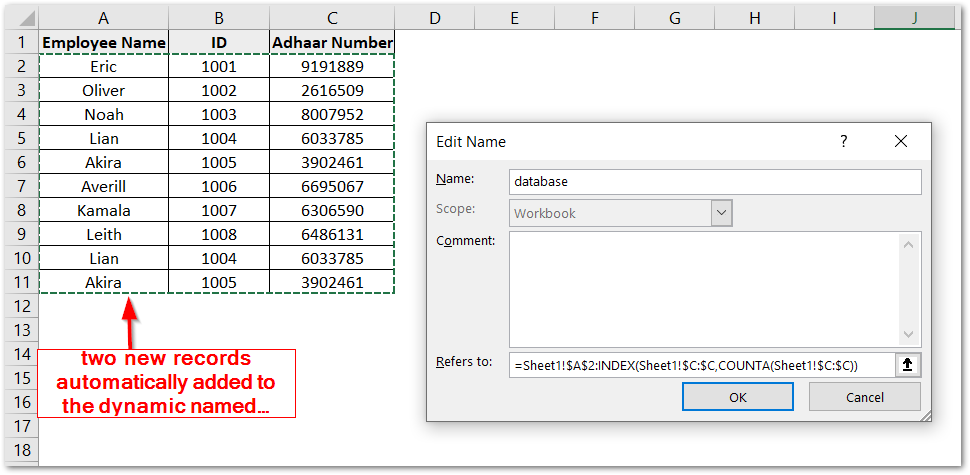
- Consequently, if you remove any record from this range, that would be automatically reflected.
However, the limitation of the one-dimensional dynamic named range is that, when you add a new column at the right of column C, it would not be added to the dynamic named range. You would need a two dimensions dynamic named range for this to work.
This brings us to the end. Thank you for reading.
