Have you ever faced a situation wherein, you have given your excel file to someone for data entry purpose and that person enters something irrelevant in the field which should have a date? And this mistake has made it totally unuseful for the intended purpose. So how to control this? How can you insert a check, so that the person who is entering the data in the excel cells does not enter any irrelevant data? To mitigate this, Excel has provided an amazing feature called Data Validation. The data validation feature is available in all the versions of Excel.
Let us learn this amazing Excel feature.
- Some Basics About Data Validation in Excel
- Where Is This Excel Feature?
- Unlocking Various Tabs Under Data Validation
- Creating Data Validation Rules
- Whole Number Validation Example
- Text Length Validation Example
- List Validation Example
- Copying Data Validation To Multiple Cells
- Finding the Cells Containing Data Validation
- Clearing or Deleting Data Validation in Cells
Some Basics About Data Validation in Excel
Data Validation is a feature provided by Excel which helps you to control what data can be entered in a particular cell or range of cells. This helps us to make the data consistent and accurate.
To give some examples, you can control that the user of the excel workbook should not be allowed to enter anything other than a date in cell B2. If he/she enters anything other than a date, then the excel should give an error popup. Similarly, you can also create a drop-down list from which the user can select the cell value. And there are many more such controls.
Where Is This Excel Feature?
Let us now navigate to the location where you can find the ‘Data Validation’ functionality.
You can find it under the ‘Data’ tab.
Under the ribbon bar, click on the tab ‘Data’. You would find the ‘Data Validation’ feature right there in the ‘Data Tools’ group.
Refer to the screenshot below:

Keyboard Shortcut: Alt+D+L

Unlocking Various Tabs Under Data Validation
As soon as you click on the ‘Data Validation’ button, you would the ‘Data Validation’ dialog box would pop up on your screen.
As you can see, there are three main tabs in the dialog box.

The first one is ‘Settings’. This is that tab where you create the validation rule as per your requirement. We would discuss each of the validation rules in detail as we move forward with this blog.
The next tab is the ‘Input Message’. This tab helps us to give a piece of information to the user regarding what they should enter in a particular cell.
The third and the last tab of this dialog box says ‘Error Alert’. There are three types of alerts that can be given to the user.
– Stop Alert (default): This alert message is used when you want to prevent the user from entering an incorrect value in the cell.
– Warning Alert: This alert type only shows a warning to the user that the value is invalid, but allows to continue with the incorrect value.
– Information: This alert only informs the user about incorrect data entry in the cell but does not restrict an incorrect entry.
Creating Data Validation Rules
In this section of this blog, we would learn to create data validation in Excel with the help of examples. We would also use the above alert messages functionality to make it more interactive.
In the ‘Settings’ tab of the Data Validation dialog box, you would find a drop-down menu arrow button. Click on this button and there is a list of various types of validations that you can create in an Excel worksheet.

Let us learn each of these validations one by one.
Any Value: This is the default validation rule in every new workbook. It indicates that you can enter any value (be it text, date, or any other content) in the cell(s).
Whole Number and Decimals: If these options are selected, the excel allows you to enter a whole number or decimals (as the case may be) in the applicable cell(s) with some additional validations like minimum and maximum acceptable values.

List: If this validation rule is applied to any cell, then you can select the values in the cell from the created drop-down list.
Date and Time: If these options are selected, the excel only allows you to enter a date or time (as the case may be) in the applicable cell(s). Also, we can provide additional validations like minimum and maximum date/time, etc.
Text Length: This validation rule controls the minimum and maximum length of the text that a user can enter in the applicable cell(s).
Custom: In addition to the above rules, you can create your own customized ones by selecting the ‘Custom’ option and creating your own complex formula.

Let us now understand the above validation rules with the help of examples.

Whole Number Validation Example
Suppose, you want to restrict the user such that he/she can only enter a whole number in cell B2 between 1 and 10000 (both inclusive).
Select the cell B2 and navigate to the ‘Data Validation’ dialog box.
Under the ‘Settings’ tab, select the option ‘Whole Number’. And specify the minimum and maximum values as 1 and 10000.

Now go the second tab of this dialog box – ‘Input Message’. As mentioned earlier, this tab is used to give information as to what the user should enter in a particular cell.
For example, we give the message like ‘This cell only accepts a whole number between 1 and 10000’.

Let us now move to the tab ‘Error Alert’. As discussed earlier, there are three types of error messages that you can provide here – Stop, Warning and Information.

The ‘Stop’ error alert restricts incorrect data entry, whereas the other two are only informative messages and would allow you to even enter an incorrect entry.
Let’s give a ‘Stop Alert’.

Click on the ‘OK’ button to activate the validation.
Testing:
As soon as you click on the cell B2, an information box would appear. This is what we entered in the ‘Input Message’ tab.

Now, enter any whole number between 1 and 10000 in cell B2. You would notice that the cell accepts the entered value.
Now, enter any value outside this range or any decimal value in cell B2 (like – 15000 or 8053.67). You would notice that excel pops out an error message.

Click on the ‘Retry’ button to re-enter the correct value.
There are many more operators like ‘equal to’, ‘greater than’, ‘less than’, etc. that you can use to restrict the whole number entry in a cell(s).

The Validation Rules ‘Decimal’, ‘Date’ and ‘Time’ works in a similar way.
Text Length Validation Example
As specified earlier, this validation rule restricts the number of characters in a text in a cell(s). Taking an example, suppose, the length of the text in cell B2 should be exactly 5 characters.
To achieve this, open the dialog box – ‘Data Validation’. Under the ‘Settings’ tab, select the rule as ‘Text Length’ and select ‘equal to’ operator.
In the input box, enter the value as ‘5’.
This time, let us use the ‘Information’ error alert. In the ‘Error Alert’ tab, select the style as ‘Information’ and provide the alert message of your choice. Press ‘OK’.

Testing:
Enter any five-character long text in cell B2 (for e.g. AB111). Excel would accept it.
Now, try entering any text which exceeds five-character (for e.g. ABC111). You would notice that excel pop out an information message dialog box.

However, you can click on the ‘OK’ button to proceed. Excel still allows us to enter the text ABC111 (six-character long). This is because we have used an ‘Information’ message and not a ‘Stop’ message.
Similar to the other validation rules, you can use other operators like ‘between’, ‘greater than’, ‘less than’, etc. in the ‘Text Length’ validation.
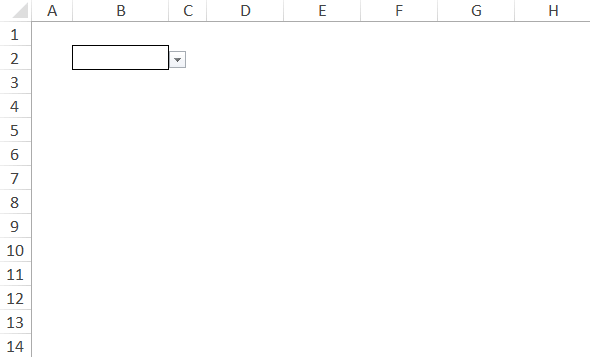
List Validation Example
There is a detailed blog on using ‘list’ validation in Excel with some more exciting tricks that you can perform. Refer to our previous blog on ‘How to Create A Drop-Down List in Excel’.
Some related blogs also include – How to Create a Dependent Drop-Down list in Excel and How to Create a Dynamic Drop Down List in Excel.
Copying Data Validation To Multiple Cells
Perform the below steps to copy the same data validation to multiple cells in Excel at one go.
Select the cell containing data validation and press Ctrl+C on your keyboard to copy the cell.
Now, click on the cell(s) to which you want to copy the data validation and then press Ctrl+Alt+V.
The ‘Paste Special’ dialog box would pop up on your screen.
Select the radio button – ‘Validation’ and then press ‘OK’.
You would notice that excel only copies the validation to the target cell(s). The validation rule as applicable to the original cell is now also applicable to the target cell.
Refer to the demonstration below:
Finding the Cells Containing Data Validation
In this section of this blog, we would learn to find all those cells in the excel worksheet that contains the data validation rules. Perform the below steps:
Press Ctrl+G (or F5 key) on your keyboard to open the ‘GoTo’ dialog box and click on the button ‘Special’. This would open the ‘GoTo Special’ dialog box would pop up.
Select the radio button ‘Data Validation’ and click ‘OK’.
Clearing or Deleting Data Validation in Cells
If you want to remove all the data validations in the worksheet, select the cell or range of cells that contain data validation. Then, open the ‘Data Validation’ dialog box (Keyboard Shortcut – Alt+D+L). Click on the ‘Clear All’ button to remove the data validations from the selected cells.

To delete only particular data validation rule from the cells (for eg- delete only Drop-down list validation), select any one cell that contains that data validation. Then, open the dialog box ‘Data Validation’ (Keyboard Shortcut – Alt+D+L). Under the tab ‘Settings’, click on the checkbox as shown in the screenshot below. Finally, click on the ‘Clear All’ button.

This brings us to the end of this blog. I hope that it was interesting. Share your views and comments in the comment section below.
RELATED POSTS
- How to Create a Drop-Down List in Excel
- ISTEXT Function in Excel – Checking if Cell Contains Text
- Named Range Excel – Updating, Data Validation
- ERROR.TYPE Function in Excel – Error Codes,Examples
- ISNUMBER Function of Excel – Checking If Cell Contains a Number
- ISREF Function in Excel – Checking for Cell Reference