Let us learn about the using Camera tool in Excel. It is a very amazing and unknown tool in Excel. The Excel Camera Tool is, by default, not available on any of the excel ribbon options.
Let us understand now learning this amazing tool.
What is So Special About Camera Tool?
Excel Camera Tool is a tool available in Excel enables us to generate a live image of a cell or range of cells. This tool helps in creating a copy of the range of cells (in the form of a live image). This live image, as the name suggests, changes its value as and when the original data cells are changed.

As mentioned in the introduction of this blog, you would not see this tool anywhere in the worksheet ribbon when you open any new worksheet. To make this tool available in the Excel Worksheet we need to enable before we use it.
Enabling the Camera Tool in Excel?
To enable the camera tool, follow the below steps:
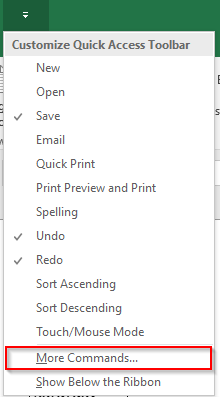
1. In the “Quick Access Toolbar”, click on the down-arrow option, as highlighted in the screenshot below:

2. From the drop-down options, select the option “More Commands”.
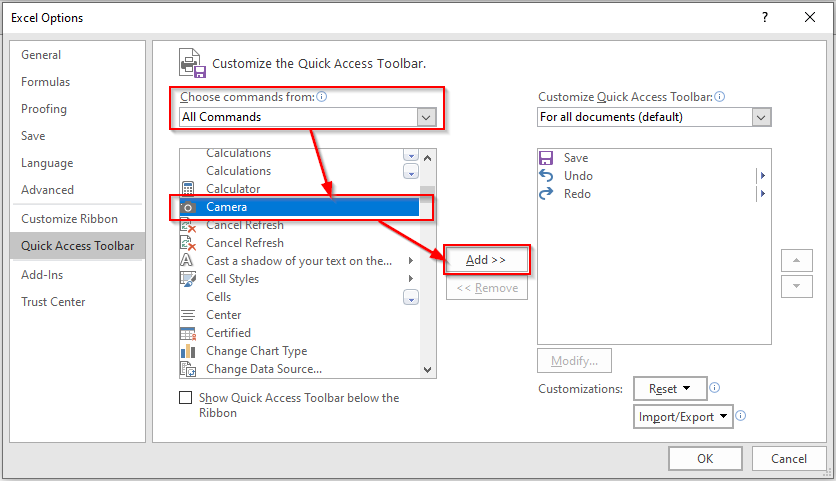
3. The “Excel Options” dialog box would open. In the “Choose Command From” section, select the option “All Commands”.
And then search for the tool “Camera” from the list of tools available. Click on the “Add” button.
Refer to the screenshot below:
As soon as you click on the “Add” button, you would notice that the “Camera” tool gets inserted into the box on the right side of this dialog box.
Click on the “OK” button to activate this option.
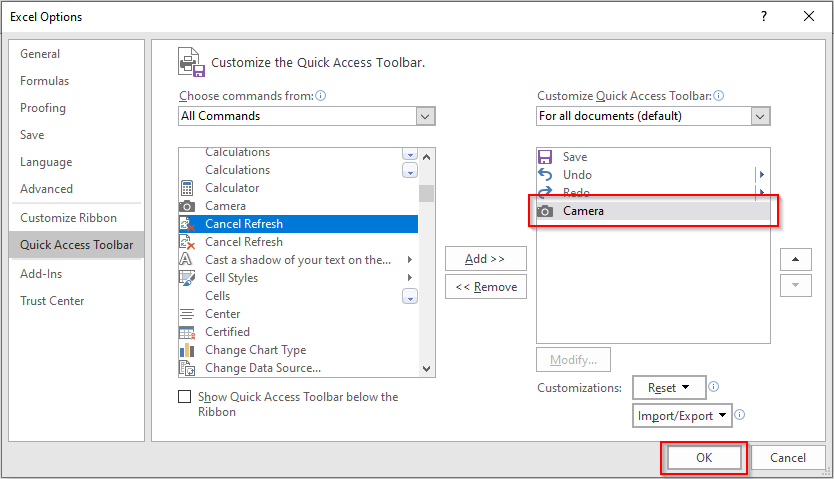
Now have a look at Quick Access Tool Bar. You would see the “Camera” tool is now available there.

How to Use This Tool?
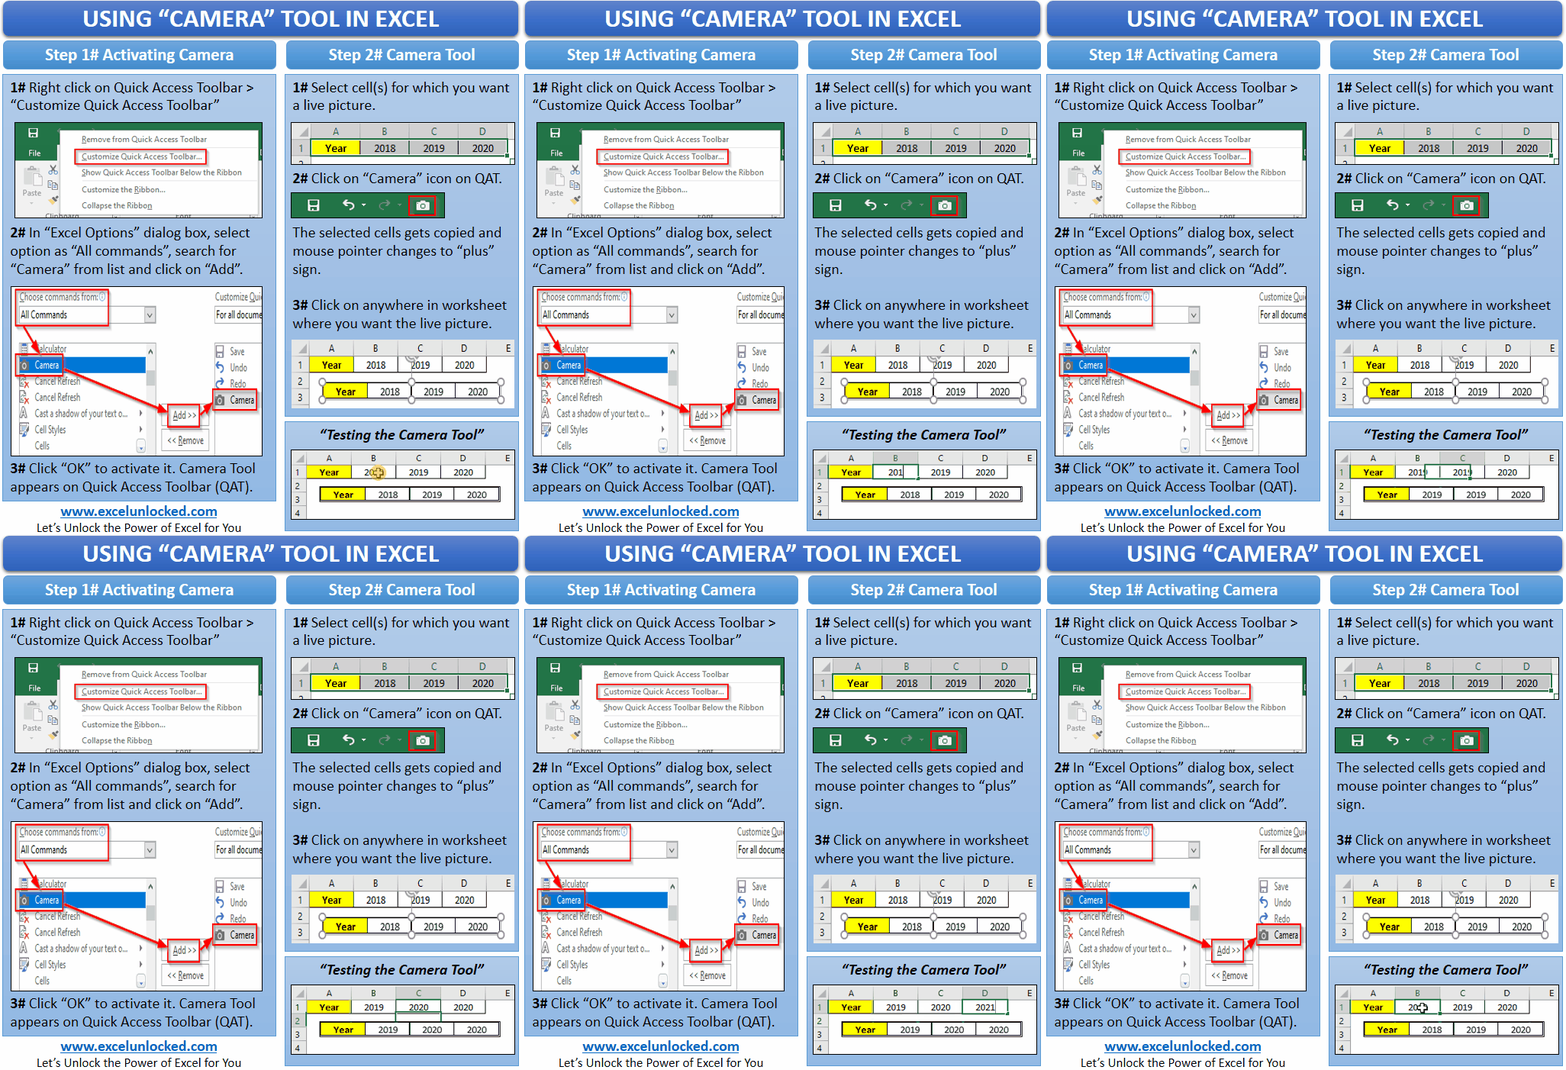
Follow the below steps to use this tool.
1. Select the cell range(s) for which you want an image (live).

2. Now, in the Quick Access Tool Bar, click on the “Camera” icon.
You would notice that the selected data range now has a continuous moving line around its border. Also, the mouse cursor changes into a plus symbol.

3. Now, click anywhere on your worksheet.
As a result, you would notice that the Excel inserts an image at that location. Finally, we have a live picture with us.

Let us now see the beauty of this tool.
Make any change in the range of cells and you would notice that the live image would automatically update.
Refer to the image below:

This brings us to the end of this amazing tool. Share your comments and views on this blog in the comment section of this blog.
