In this blog, we are going to learn to assign a macro to objects like an image and a checkbox ( ActiveX Control ) in Excel. So let us begin learning.
Example of Macro
You can use this practice workbook.
We are going to make a macro through the VBA editor. Follow these steps to write a simple VBA code.
- Hold on to the Alt key and then press the F11 key. Consequently, this opens the VBA editor of excel.
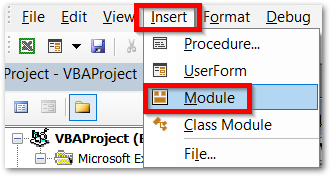
- Click on the Module button in the Insert tab of the VBA editor. This inserts a new module in the workbook.
- Open the code window for module 1. Enter the following piece of code into it.
Sub change_cell_color()
If Range("A1").Interior.Color = vbBlue Then
Range("A1").Interior.Color = vbWhite
Else
Range("A1").Interior.Color = vbBlue
End If
End Sub
- Close the VBA editor (hold alt and press F4 ).
Running this macro named change_cell_color will change the fill color of cell A1 to Blue and if cell A1 is already blue then it would be toggled back to white fill color. We would now assign macro to image and then to checkbox

Assigning Macro to Graphic
Now we will assign the above macro to an image. Follow these steps.
- Move on to the Insert tab on the ribbon. in the Illustrations group, click on the Pictures button.
- We are now inserting an image from This Device ( Locally from the computer )
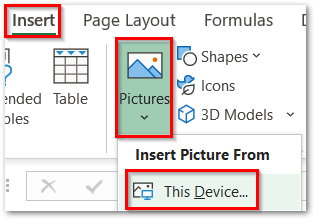
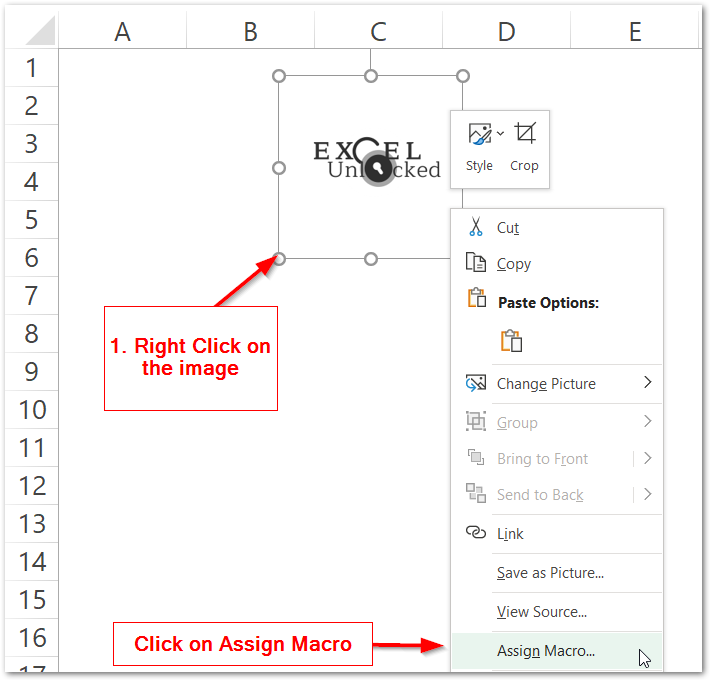
- We have inserted the following image into the workbook as follows. Right Click on the image in the shortcut menu, and click on the Assign Macro option.
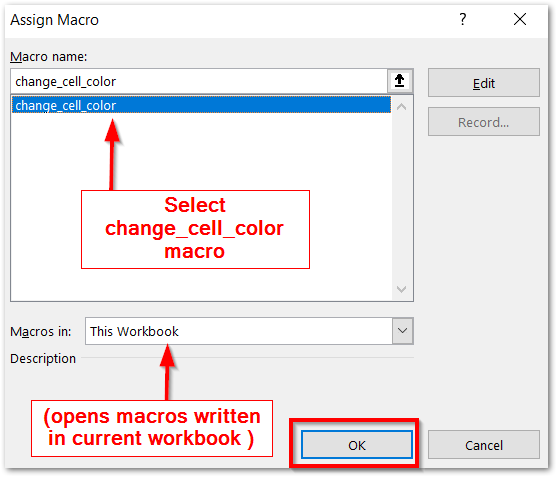
- This opens the Assign Macro dialog box. Select the change_cell_color macro and click Ok.
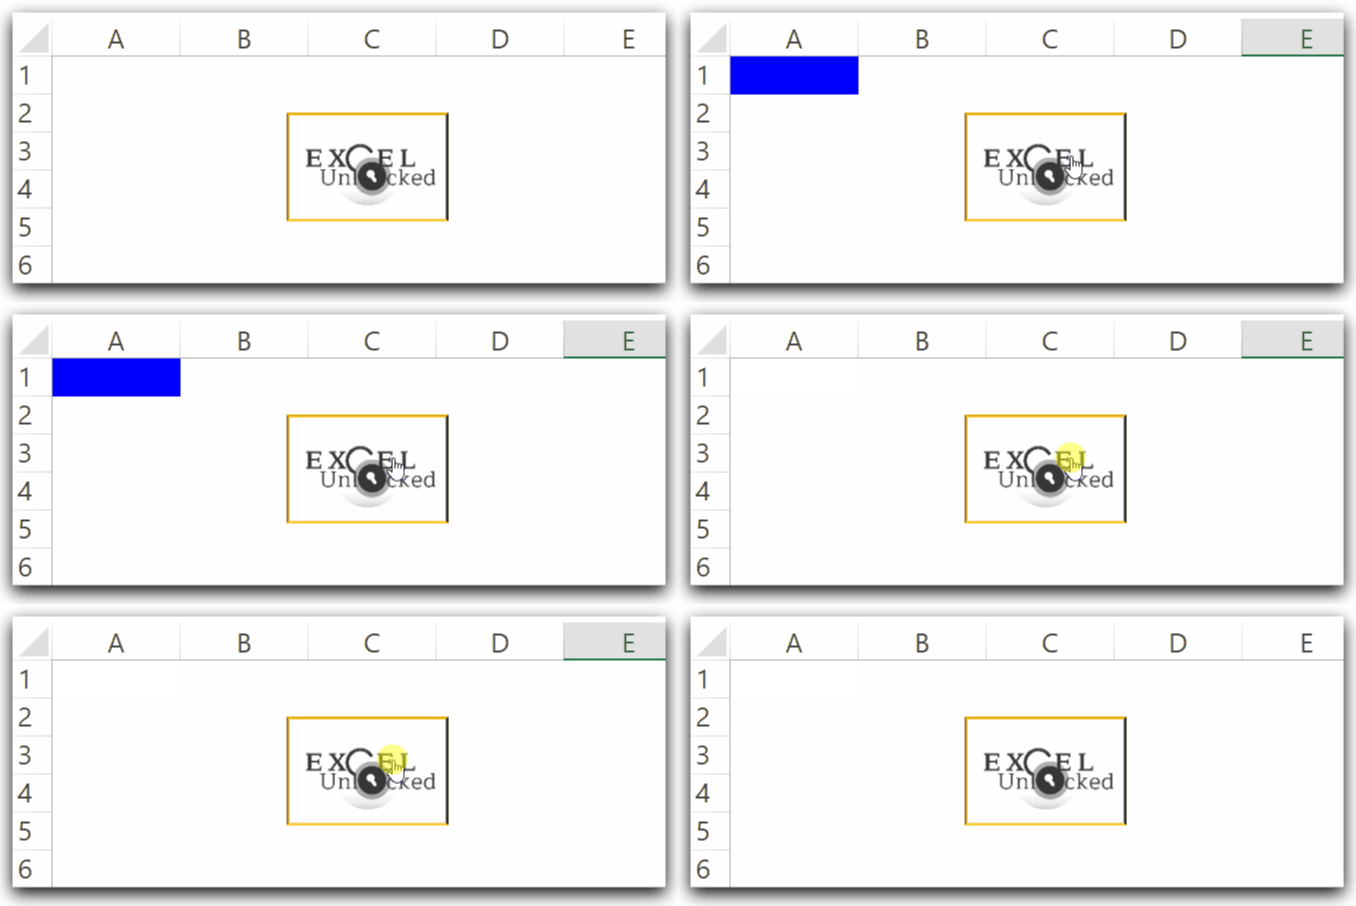
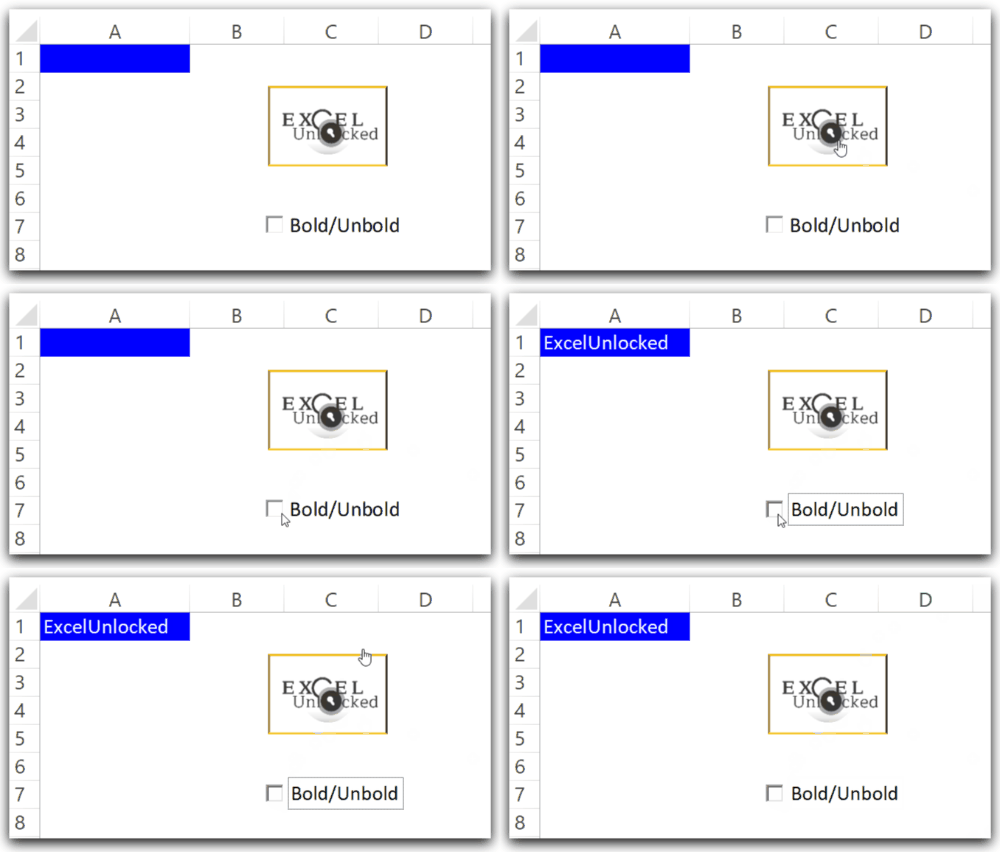
As a result, when you click on the image multiple times, you see that cell A1 changes its fill color as follows.
Also Read: Active Cell VBA – Properties and Methods
Assigning Macro to a Checkbox
We would now use a check box to bold and remove the bold text in cell A1. All you need to do is:-
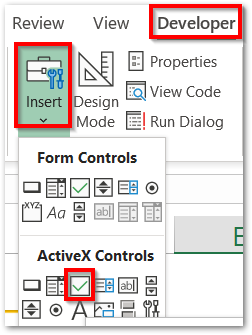
- Move to the Developer tab. From the Controls group, click on the Insert button.
- Select the Checkbox ActiveX control.
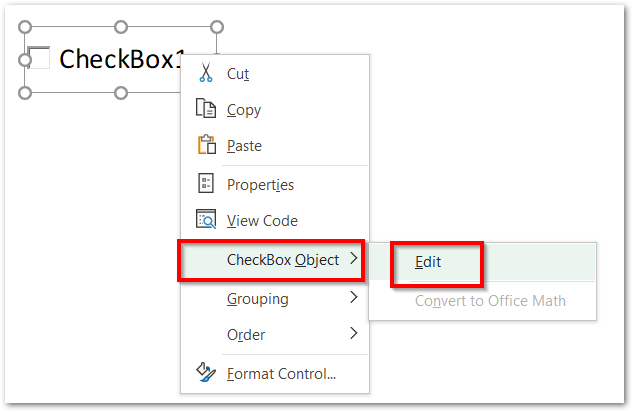
- Drag the mouse pointer in the work area to insert a checkbox. Right-click on the checkbox and click on CheckBox Object–>Edit to change the name of this checkbox to Bold/Unbold.
- Make sure to come out of design mode using the developer tab ( when you finish editing the name of Checkbox ).
- Right-click on the checkbox and click on the View Code option. Enter the following code in the VBA editor.
Private Sub CheckBox1_Click()
Range("A1").Value="ExcelUnlocked"
If CheckBox1.Value = True Then
Range("A1").Font.Bold = True
Else
Range("A1").Font.Bold = False
End If
End Sub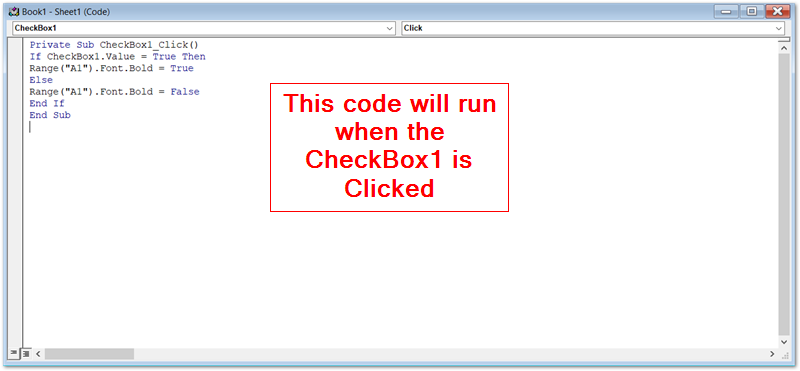
- Exit the VBA editor.
Now when you check and uncheck the inserted checkbox, the code will be executed and make our text bold and unbold.
This brings us to an end.
Thank you for reading.
