While recording a macro, we would have two different types of available cell referencing methods. The first one is absolute referencing which is followed by default. We are now going to learn about relative referencing in excel macros and then implement it.
So let us begin learning.
Relative Referencing in Excel Macro
In relative referencing, all the activities are recorded on the base of active cell. The movement to another cell or range is also based on the how much rows and columns need to be jumped to reach that cell from the current/active cell.
- Active cell is the selected cell where the data would be entered if you began typing.
- Macro considers the number of rows and columns from the active cell.
Use the following file to practice.
Example – Creating a Macro using Relative Referencing
In this section, we would now create a macro using excel. Using this macro we are going to perform the following steps.
- Select the current record of the data
- Highlight the current record.
- Move to the first cell of next record
We would need relative referencing in this macro because of these reasons.
- The current record is not any fixed range of cells to apply absolute referencing. It could be either 1st row, second row or nth row.
- The movement to the cell in the next row is also relative to the actively selected row. We need to shift one row down with respect to the selected record. Neither the selected record is fixed ( absolute / hard coded ) nor the cell one row below it.
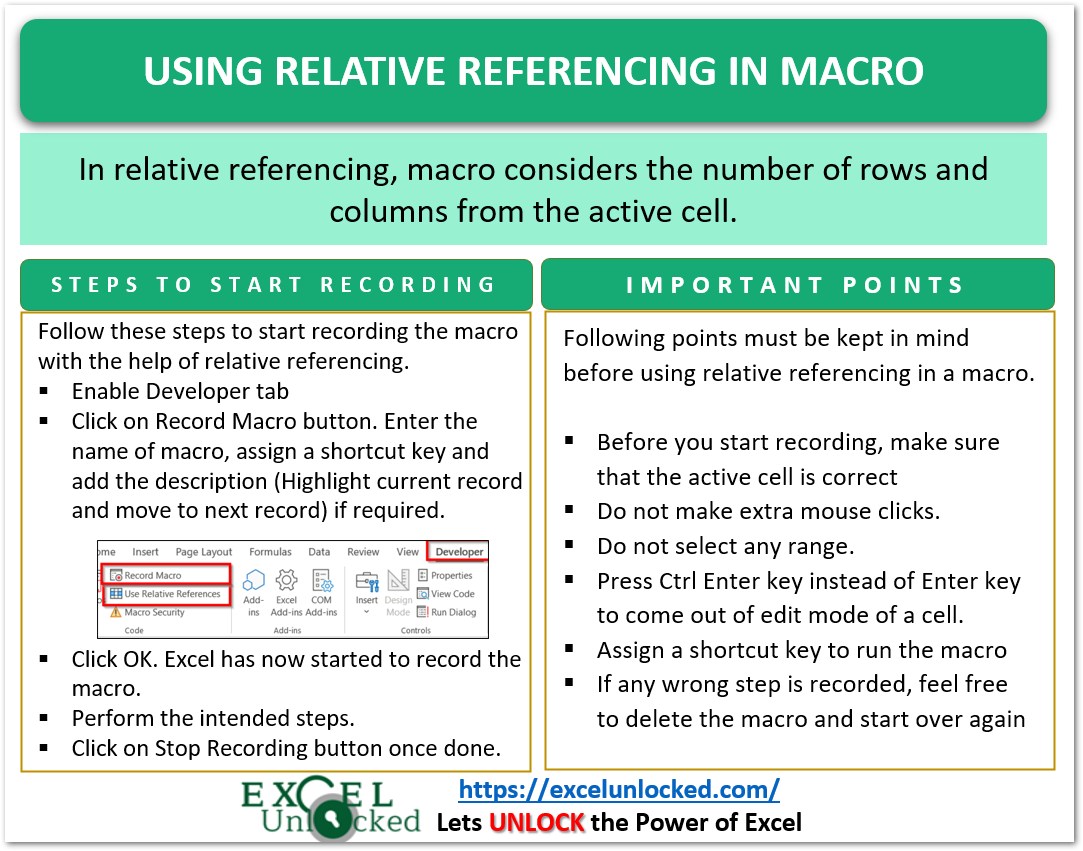
How to Enable Relative Referencing in a Macro
Enable the Developer tab on the ribbon and follow these steps.

- Select Cell A4 ( you can select any cell from the range A2:A8 ) on the worksheet to start recording the macro from a valid record. You cannot make undefinable random movements. The currently selected cell would be the current row that we wish to apply macro on.
- Go to the Developer tab on the ribbon.
- Click on the button ” Use Relative Referencing” in the Code group.

- Click on Record Macro button. Enter the name of macro, assign a shortcut key and add the description (Highlight current record and move to next record) if required.
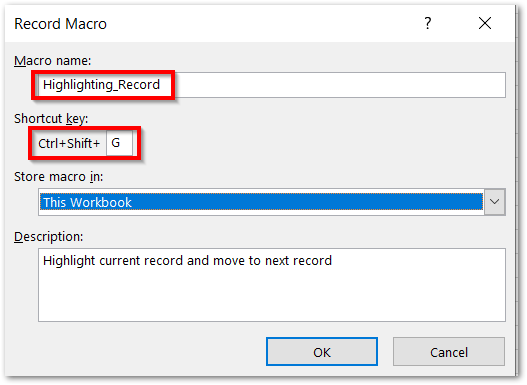
- Click OK. Excel has now started to record the macro.
Recording the Steps of Macro
Since the recording has started, you need to follow these steps as mentioned. Do not make any extra clicks or select any range or cell that is not mentioned in these steps. Feel free to delete the macro and start recording again if you perform something wrong while recording.
- Hold the Ctrl key and press the shift and right arrow keys. This will select the range A4:D4

- Hold the Alt key and press H H keys. Choose the color to highlight this range.
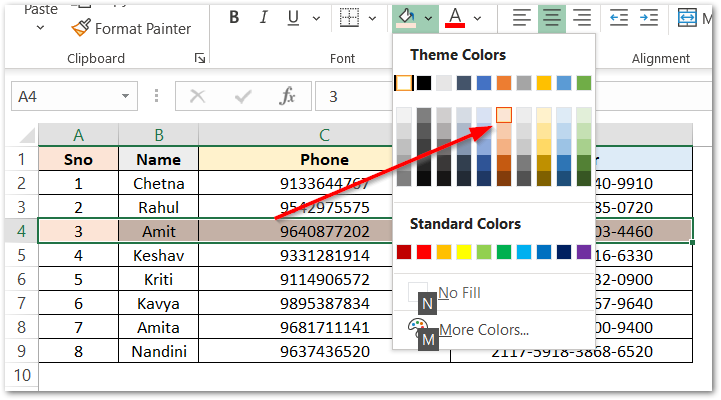
- Press the down arrow key to shift to the first cell of next record which is A5.
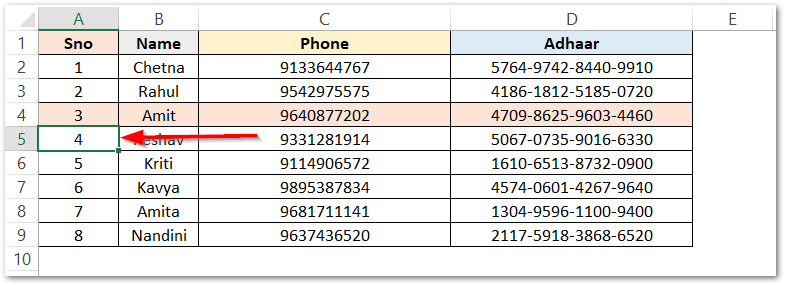
- Press the Stop Recording button in the Developer tab to stop recording the macro.
Running the Macro
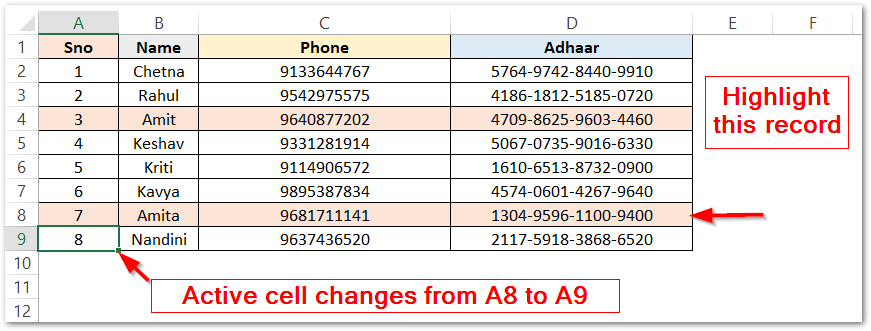
To highlight the record number 7, follow these steps.
- Go to cell A8 (active cell).
- Hold the Ctrl key and press Shift G keys.
This would highlight the record that contained the active cell (A8) and move the active cell to the first cell of next record which is A9.
This brings us to an end.
Thank you for reading.
