Do you know that excel also provides with the Header and Footer Feature in Excel? In this blog, we would learn how to insert or make a header in Excel. We would also go through some of the pre-defined excel header and footer and also learn how to create our own custom header or footer in Excel.
Brief Information on Excel Headers and Footers
Excel Headers and Footers are the text or images placed on the top and bottom of each of the pages respectively. These texts/images provide some basic information about the pages or the document like the title of the document, page number, company logo, date/time, etc.
- Brief Information on Excel Headers and Footers
- Navigating to Header and Footer Feature in Excel
- How to Insert Excel Preset Header and Footer
- Custom Header and Footer Using Elements
- Insert Picture or Image in Excel Header or Footer
- Add Headers and Footers in Multiple Sheets at One Go
- Other Miscellaneous Options In Design Tab
- How to Change Font Size and Color of Header and Footer in Excel
- Show or Hide Header and Footer in Excel
- Remove or Delete Header and Footer in Excel
Microsoft has given many standard headers and footers which are inbuilt to excel. Additionally, you can also create your own customized ones to make a more good looking excel document and reports.
Navigating to Header and Footer Feature in Excel
In excel, the headers and footer feature is available at two places.
- Go to the ribbon tab Page Layout. Under the Page Setup group, you would find a small icon on the bottom right corner. This is the dialog box launcher. Click on it and the Page Setup dialog box would appear on the screen. There, you can find a specific tab named – Header/Footer.

- Additionally, you would find the Excel headers and footers feature under the ‘Insert‘ Tab. Click on the ‘Insert‘ tab > ‘Text‘ group > Header & Footer Option.

Now, when you know the path for navigating to this feature, let us begin with exploring this rarely used feature.
How to Insert Excel Preset Header and Footer
As mentioned in the introduction of this blog, excel has provided with some pre-defined headers and footers that you can use. To insert the preset headers and footer, you can use either of the navigation paths. Let us check on both of these.
Using Page Setup Dialog Box
- Navigate to the Page Setup dialog box > Header/Footer tab (as learned in previous section).
- The option ‘None‘ (shown in the screenshot below) means at present no headers/footers are put in the worksheet.

- Click on the ‘Header‘ drop-down option arrow and there you would find many available header options provided by Microsoft. Select one of your choices. Similarly, under the ‘Footer‘ drop-down option, you can find and select the one from the available default footers.
For example, I have chosen to insert the workbook or file name as headers and the current sheet’s name and the page number as the footer part. See the image below:

As soon as you press the OK button, the dialog box would exit, and excel would insert the headers and footer on the active worksheet.
Header looks like this:

Footer looks like this:

Using Insert Header and Footer – Design Tab
- Go to the Insert tab and click on the option – Header & Footer (under Text group).
- This would instantly and quickly create a structure of excel headers and footers in the worksheet. Simultaneously, excel also inserts a new tab in the ribbon with the name ‘Design‘ (as shown below).

- To insert preset excel headers, click on the header structure in the worksheet area. Under the Design tab, click on the option that says ‘Header‘. As a result, a drop-down list of all the available predefined excel headers would be displayed. Select one of your choices and that’s it.

- Similarly, to insert footer from the predefined list of footers, click on the option that says ‘Footer‘ under the ‘Design’ Tab > ‘Header & Footer’ group. From the list of drop-down options, select one of your choices, and you are done.
Custom Header and Footer Using Elements
In addition to the predefined headers and footers, you can also create custom ones by using the Header and Footer Elements. These elements are available in the ‘Design‘ tab, as shown in the image below:
Also Read: Formatting – Format Cells Feature in Excel

Procedure to use and insert these elements:
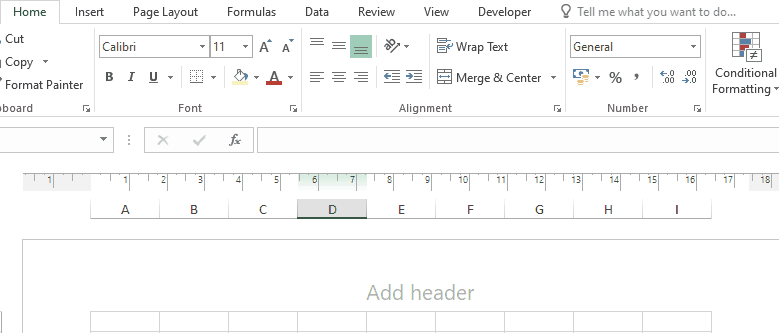
- Click on the appropriate header area. Let us first enter the middle part of the header.
- Now, go to the ‘Design‘ tab in the ribbon and select the element to insert, for example, FileName. Click on the option – File Name, and as a result, excel would insert the word &[File] there.
- To see the exact header text, click anywhere on the worksheet.
In a similar manner, you can insert the left and right parts of the header by selecting the part and then following the above procedure.
When you are on the header part and you want to move to the footer part, there are two possible ways to do so:
- The first one is to use the right scroll bar to move downwards until you see the footer.
- The second and the most prominent one is to use the option – ‘Go To Footer‘ (Design Tab). By clicking on this, you would instantly jump to the Footer part.

Using Combination of Elements to Customize Headers and Footers
One interesting thing with using the custom header or footer in excel is that you can use a combination of multiple elements. Suppose, we want to show the page number in the footer in this format – Page <Current Page No.> of <Total Pages> (For Eg – Page 1 of 19). There is no element to achieve this.
However, you can use the combination of two elements – Page Number and Number of Pages to get the required text. The below demonstration is self-explanatory.

Insert Picture or Image in Excel Header or Footer
Follow Below Steps to Insert Image or Picture in Header and Footer in Excel
- Navigation
Click on the appropriate header or footer area and go to the ‘Design‘ Tab.
- Picture Element
Under the ‘Header and Footer Elements’ click on the element that says – ‘Picture‘.
- Insert Picture Dialog Box
In the ‘Insert Picture’ dialog box that appears, search for the picture that you want to insert and click on the ‘Insert’ button.
As a result, the excel would insert the picture inside the header or footer. Once the picture is inserted in the header or footer, the ‘Format Picture‘ element gets activated.

You can resize the picture inside the header or footer, increase picture height or width. You can also, set the top, left, bottom, and right alignment of the picture using this option. Excel also provides you with the option to change the color setting (including brightness and contrast).

Add Headers and Footers in Multiple Sheets at One Go
When you insert a header or a footer using the method(s) stated above, it only gets added to the active sheet. Header and Footer do not apply to all the worksheets in the excel workbook.
To do so, you need to first group the worksheets and then perform the above steps to add header or footer to all those grouped worksheets.
Make sure that you remember to ungroup the grouped worksheets once your task is over.
I have an exclusive blog on Grouping and Ungrouping Worksheets in Excel. To read it, click here.
Other Miscellaneous Options In Design Tab
There are four miscellaneous but very important checkboxes in the Header and Footer Design Tab which are explained below:

- Different First Page – When you want to have a different header or footer for the first page, tick this checkbox and then give a separate header and footer for the first page. For the other pages, you need to again give a header or footer only on the second page and it would be applicable for all the pages (except for the first page).
- Different Odd & Even Pages – As the name suggests, tick this checkbox, if you want that the odd pages (1, 3, 5, and so on) should have different headers/footers than the even pages (2, 4, 6, and so on).
- Scale with Document – The scale with document checkbox is ticked by default. A tick means when you change the scale of the document (while printing), the header and footer font size will also change accordingly. To stop changing the header and footer size while scaling the document for printing, uncheck this option.
- Align with Page Margin – It is better to have this option activated so that the headers and footers are aligned according to the page margin.
How to Change Font Size and Color of Header and Footer in Excel
To change the font settings of the header and footer, simply select the header or footer using the mouse (keyboard shortcut selection would not work).
A small font formatting dialog box would appear on your screen. Use the font formatting options as per your need, as shown in the below demonstration.

Show or Hide Header and Footer in Excel
You can show or hide the header and footer in Excel by toggling between Normal view and the Page Layout view. See the below path to toggle between the views.
- In the status bar, you can toggle between the ‘Normal’ and ‘Page Layout’ button to show or hide the Excel headers and footers.

- The same options are available in the ‘View‘ tab in the excel ribbon, as shown below.

Remove or Delete Header and Footer in Excel
Finally, let us learn multiple ways to remove the header and footer from Excel worksheet.
- Simply click on the header or footer and press Delete or Backspace key on your keyboard to remove the header or footer from all the pages.
- Another way is to go to the ‘Page Setup’ dialog box and set it to ‘(None)‘, as shown below:

With this you have reached to the end of this blog. Share your thoughts, views, and comments in the comments section below.