An Object in Excel is nothing but the external documents within an excel workbook. Excel has provided with the feature to insert or embed an external file (like PDF, word file, excel file, etc.). By inserting an object into Excel, one can quickly access that object or external document from the excel workbook itself without navigating to the external file location. This feature is also available in other Microsoft Office Utilities (like Word, Excel, PowerPoint).
In this blog, we would learn how to insert a new object as well as insert an existing object in Excel. We would unlock the technique to link the existing object with the source object so that changes made in the source file gets reflected in the embedded object.
What are Objects in Excel
As mentioned, an object in Excel is nothing but an external document that is placed within an excel workbook. This enables the user to quickly access that external file/document directly from the excel workbook.
Where is the Object Feature in Excel
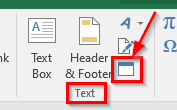
To navigate to the ‘Objects’ feature in Excel, follow the path – Insert tab > Text Group > Object button.
Also Read: What is VBA Module? Types, Insert, Remove
As soon as you click on the Object button, the ‘Object’ dialog box would pop out on your screen:
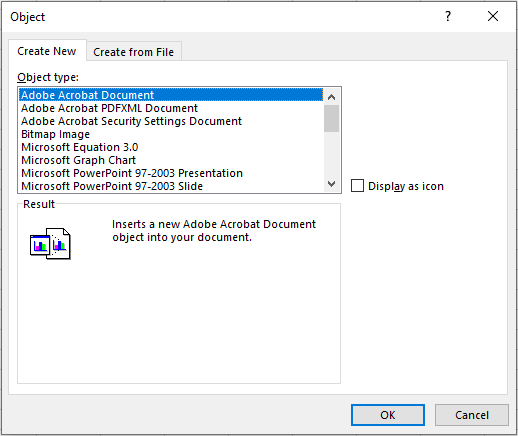
There are two tabs in this dialog box – “Create New” and “Create from File”. The names of the tabs in itself are self-explanatory.
The ‘Create New’ tab has options to insert a new document/file in the workbook.
The ‘Create from File’ tab enables one to insert or embed an existing file from a folder in the workbook.
Insert or Embed New Object in Excel
To insert a new document or file in Excel, go to the ‘Create New’ tab, and select the required object type from the list of available Object Types. Let us, for example, insert a new word document in excel worksheet.
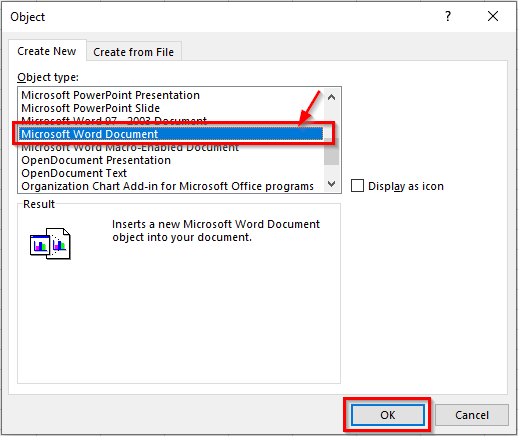
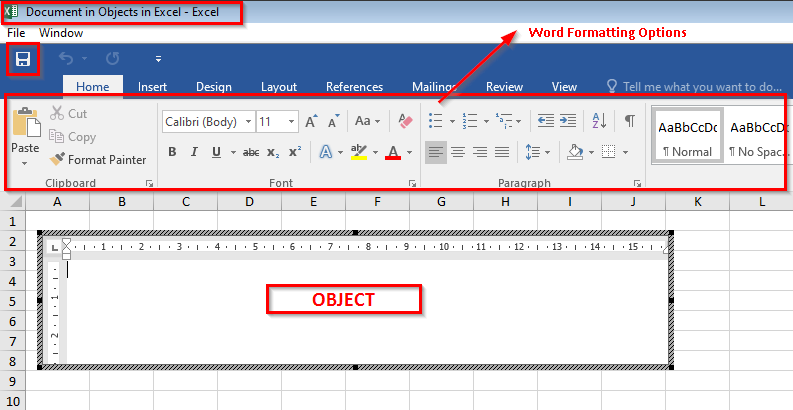
As a result, the excel would insert a word document in the active worksheet. The excel file name would appear like – “Document in <File_Name>”, where File_Name is the excel workbook file name.
Also Read: Object Browser in VBA
In the word document window, you can write the text and save it. All the ribbon formatting options available in any new word document are available here for editing the embedded word document.
See the image below:
To go back to the excel file, simply click anywhere in the worksheet area.

You can even hold this document and drag it anywhere in the worksheet to place it at the desired location.
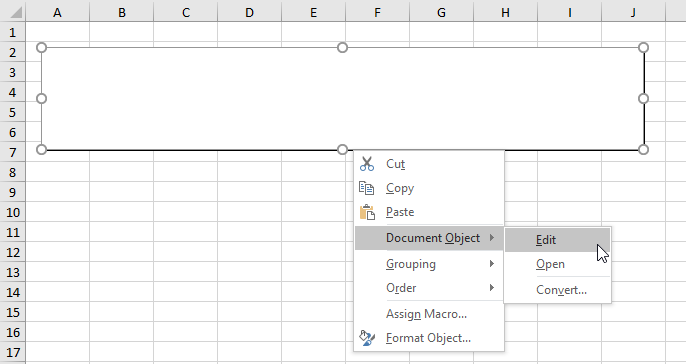
To again edit the embedded word document, simply double click on it, and you are back to the edit screen. Or you can even, Right-Click on Object > Document Object > Edit
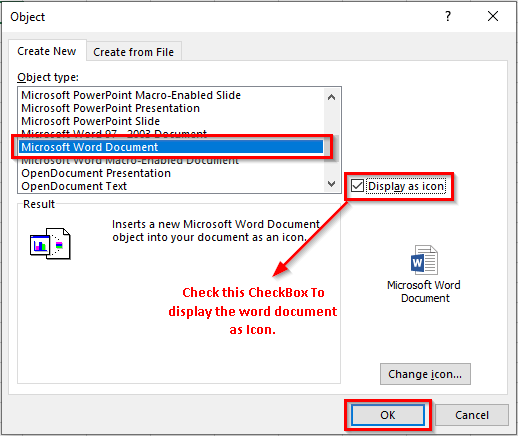
Instead of inserting the entire document like this, you can insert an icon of the file or document. To do so, simply tick the checkbox – ‘Display as Icon’ in the ‘Object’ dialog box, as shown in the image below:
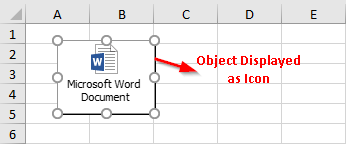
To edit the word document or file, double-click on the icon to open the word document. Or you can even right-click on the object > Document Objects > Edit. Here, you can then edit the document, and save it.
Note: It is important to note that, any new file or document created or embedded within an excel workbook, it only limited to the workbook, and is not saved anywhere in the system directly.
Insert or Embed An Existing Object in Excel
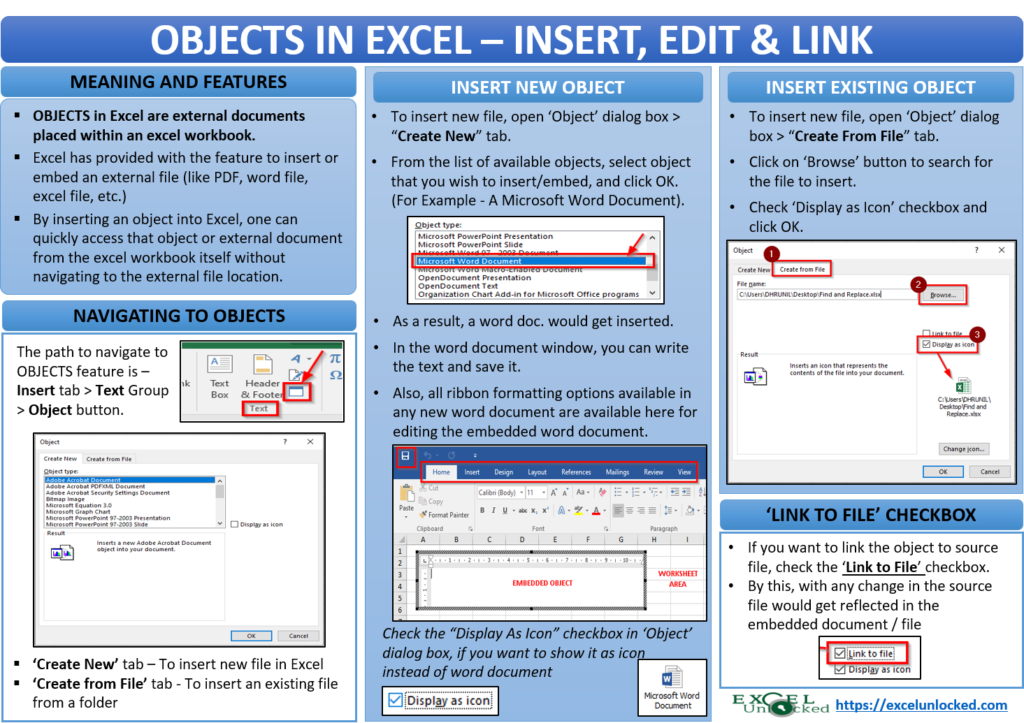
To insert an existing object in excel, go to the ‘Create from File’ tab. Use the ‘Browse’ button to browse for the file.
To display the file icon, make sure that you tick the ‘Display as Icon’ checkbox.
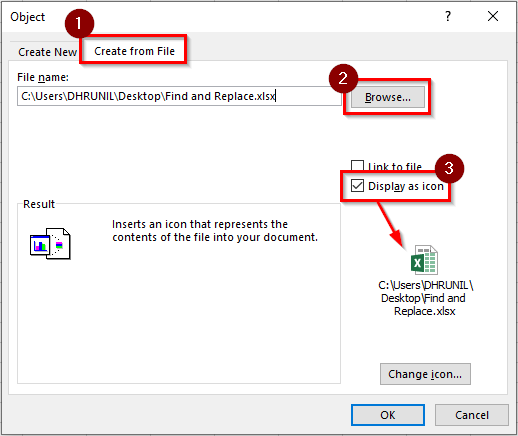
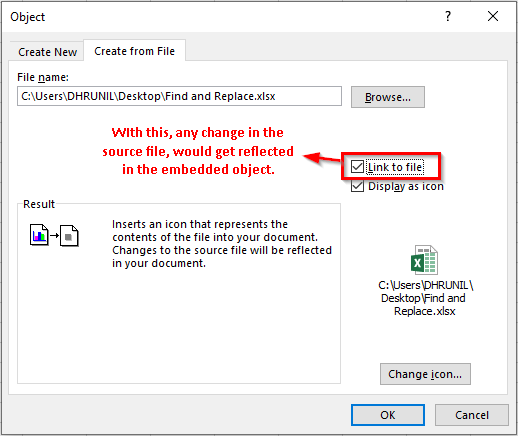
Note – When you simply insert any object, whether as an icon or not, it becomes part and parcel of the workbook itself. That means any change carried out in the original source file after the object is inserted, would not be reflected in this object. So in order to link them, tick the ‘Link To File’ checkbox as highlighted in the image below:
Important Points to Keep in Mind
- Embedding an object (without linking it to the source file) would increase the file size of the excel workbook, as the object becomes a part of the excel workbook (discussed earlier).
- Once you link the source file, it means that the source file is not a part of the excel worksheet, but is linked to an external document.
- Once a link is established, the source document cannot be edited by double-clicking on the object. You can only view it. In this case, to edit the object content, you need to directly make changes in the source file, to get it reflected in the embedded object.
- Make sure that you do not change the device and the location of the source file (after it is embedded as an object). If you do so, the object would not work as expected.
Change Icon and Name of Object in Excel
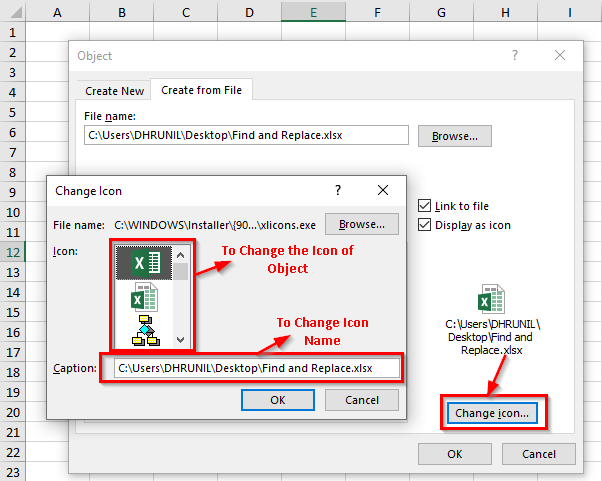
To change the icon of an embedded or inserted object, use the ‘Change Icon’ button in the ‘Object’ dialog box.
In the ‘Change Icon’ dialog box, you can choose the relevant icon from the list of available icons.
By default, the name of the Object is the path/location of the object. To change this default name, enter the name of your choice in the ‘Caption’ input box.
Refer to the image below:
With this, we have reached to the end of this blog. I hope, this blog was informative and useful to you.

