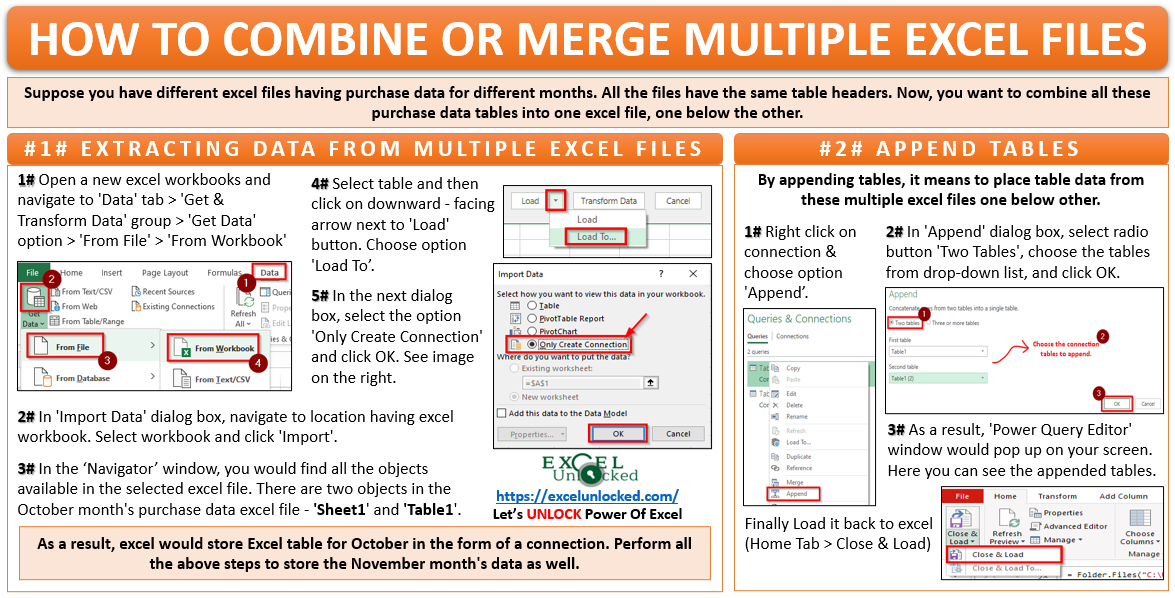
A question that is being asked on various forums from excel users – “How to combine multiple excel files into one?”. Many excel experts suggest using the VBA Editor window to create a subprocedure for the same. However, why to go for a complex VBA coding, when you can use a standard excel feature to combine multiple excel files into one excel file. Excel Power Query Feature will help you in combining or merging all or multiple excel files.
Excel power query (also popularly known as ‘Get & Transform) is an amazing feature provided by Microsoft in its office suits to extract data from external sources into excel and play around with it. If you are an Excel 2016, 2019, or Office 365 user, then check the ‘Data’ tab > ‘Get & Transform Data’ group. Here, you can find all the Excel Power Query options.

But, if you are using Excel 2010 or Excel 2013 versions, then no need to worry. There is an excel power query add-in downloadable from the Microsoft Software Center. Check this link.
What are Advantages of Using Power Query?
Excel users prefer using the power query feature to get data from external sources because of the following advantages:
- Using the power query feature is very user-friendly. There is no coding or complex formula involved in it.
- Another advantage of using this feature is that, as you perform power query steps to combine excel files, it records and stores those steps. These recorded steps can be reused in the future just like we reuse the macro recordings.
To learn more about basics on power query, check our blog on – Overview of Power Query in Excel
Sample Data for Combining Multiple Excel Files
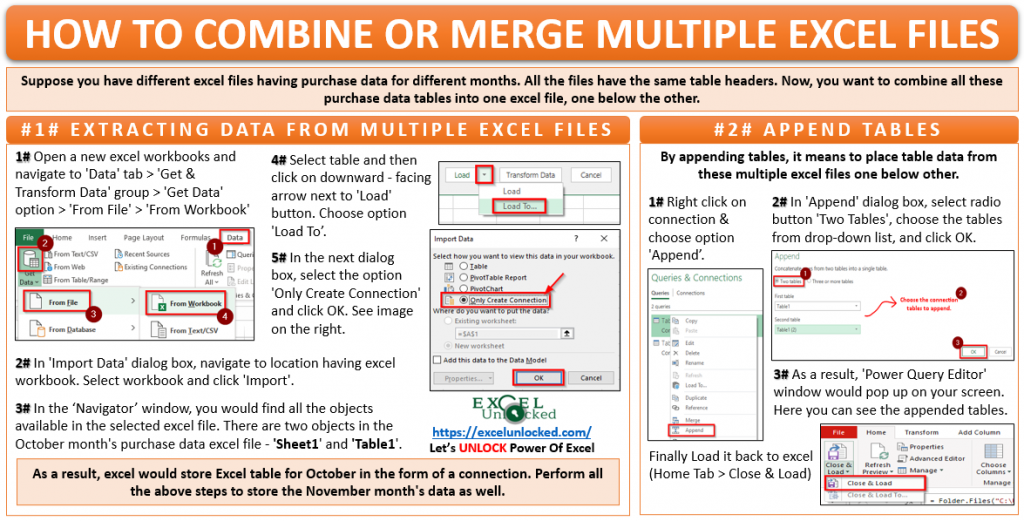
Suppose you have different excel files having purchase data for different months. All the files have the same table headers. Now, you want to combine all these purchase data tables into one excel file, one below the other.
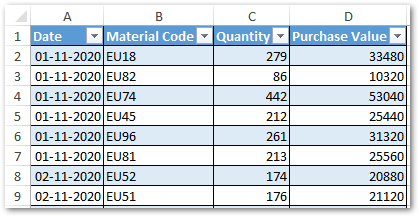
Make sure that the data in the individual excel workbooks are in the form of an Excel table. If not, then click anywhere on these individual datasets, and use the keyboard shortcut ‘Ctrl + T’. In the dialog box – ‘Create Table‘, simply click OK.
Steps by Step Guide for Combining or Merging Excel Files
To combine multiple excel files to one excel file, involves two activities:
- Get data from multiple excel files and store it as query connections
- Append these query connections (i.e. place the data one below the other)
Store Data From Multiple Files As Connections
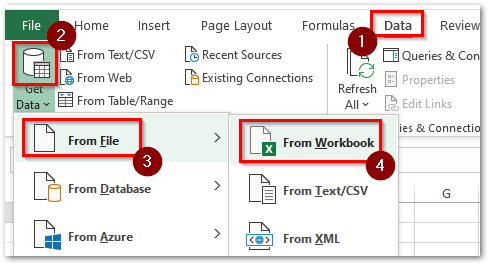
- Open a new excel workbooks and then navigate to ‘Data’ tab > ‘Get & Transform Data’ group > ‘Get Data’ option > ‘From File’ > ‘From Workbook’ as shown below:
- In the ‘Import Data’ dialog box that appears, navigate to the location having the excel workbook. Select the workbook and click ‘Import’.
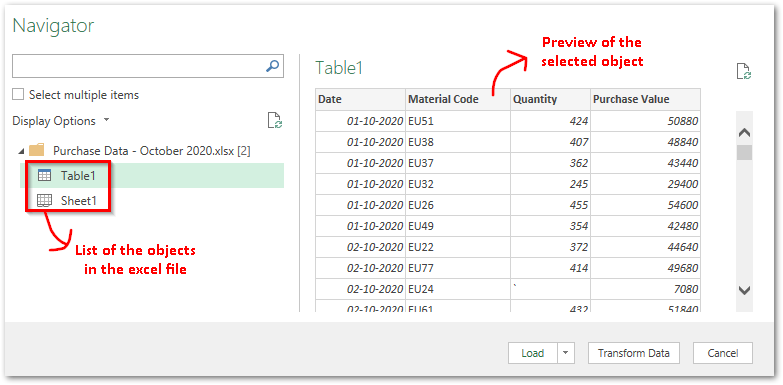
- In the ‘Navigator’ dialog box, you can see the list of all the objects available in the selected excel file on the left pane. There are two objects in the October month’s purchase data excel file – ‘Sheet1‘ and ‘Table1‘. This is the reason why I mentioned above that the dataset in the individual excel workbooks should be a proper Excel table.
- Since we have to combine this imported data with the November month’s data, therefore, we shall store it temporarily as a ‘Connection’. To store data as connection, click on the downward-facing arrow next to the ‘Load’ button and select the option ‘Load To’.

- In the ‘Import Data’ dialog box, select the option ‘Only Create Connection’ and OK.
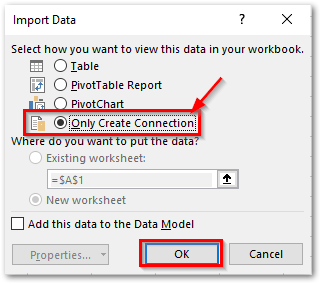
- As a result, excel would store the Excel table for October in the form of a connection.

Similarly, perform all the above steps to store the November month’s data as well. Finally, you have two connections ready with you to merge.

Append Connections in Power Query
Once the connections are ready, let us place the table data from these multiple excel files one below the other. It is known as “Appending data or connections in power query”.
- Simply right click on any of the connection and choose the option ‘Append’ as shown in the image below:

- In the ‘Append’ dialog box that appears, simply select the radio button ‘Two Tables’, choose the tables from the drop-down list, and click OK.

- As a result, the ‘Power Query Editor’ window would pop up on your screen. Here you can see the appended tables.

- Change the Query name like shown below:
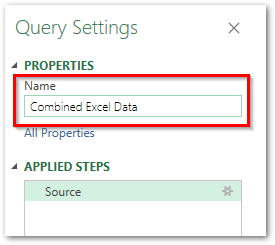
- Let us finally get this data to Excel worksheet. To get the appended table back to excel, simply go to the ‘Home’ tab > ‘Close & Load’ option.

Resultantly, you have your combined excel file ready with you. In total, 600 rows of data are now loaded into the excel file.
What If There is Some Change in Source Table?
The Excel power query feature is not used just to get data from sources. The steps stored as queries and connections are reusable steps. Meaning, when there is any change or new rows of data in the source excel files (October and November month’s), then you can get this updated data appended quickly by a simple activity of power query refresh.
Let us, for example, add some more rows of data to October month’s file.
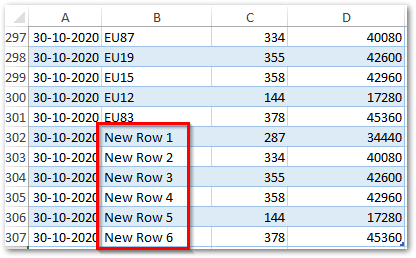
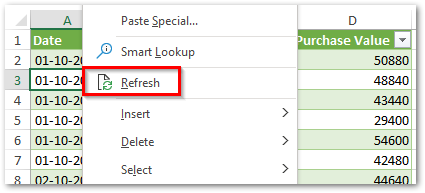
To get this updated data to the appended table, simply right-click anywhere on the appended table and choose the option ‘Refresh’.
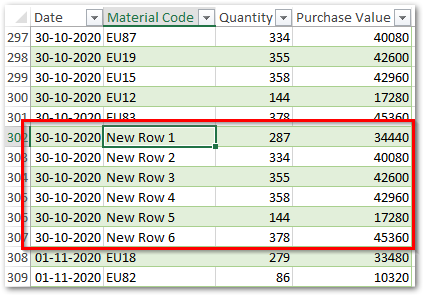
As a result, within few seconds, you have the new rows added to the appended table.
With this, we have completed this tutorial on combining or merging excel tables from multiple excel files into one.

