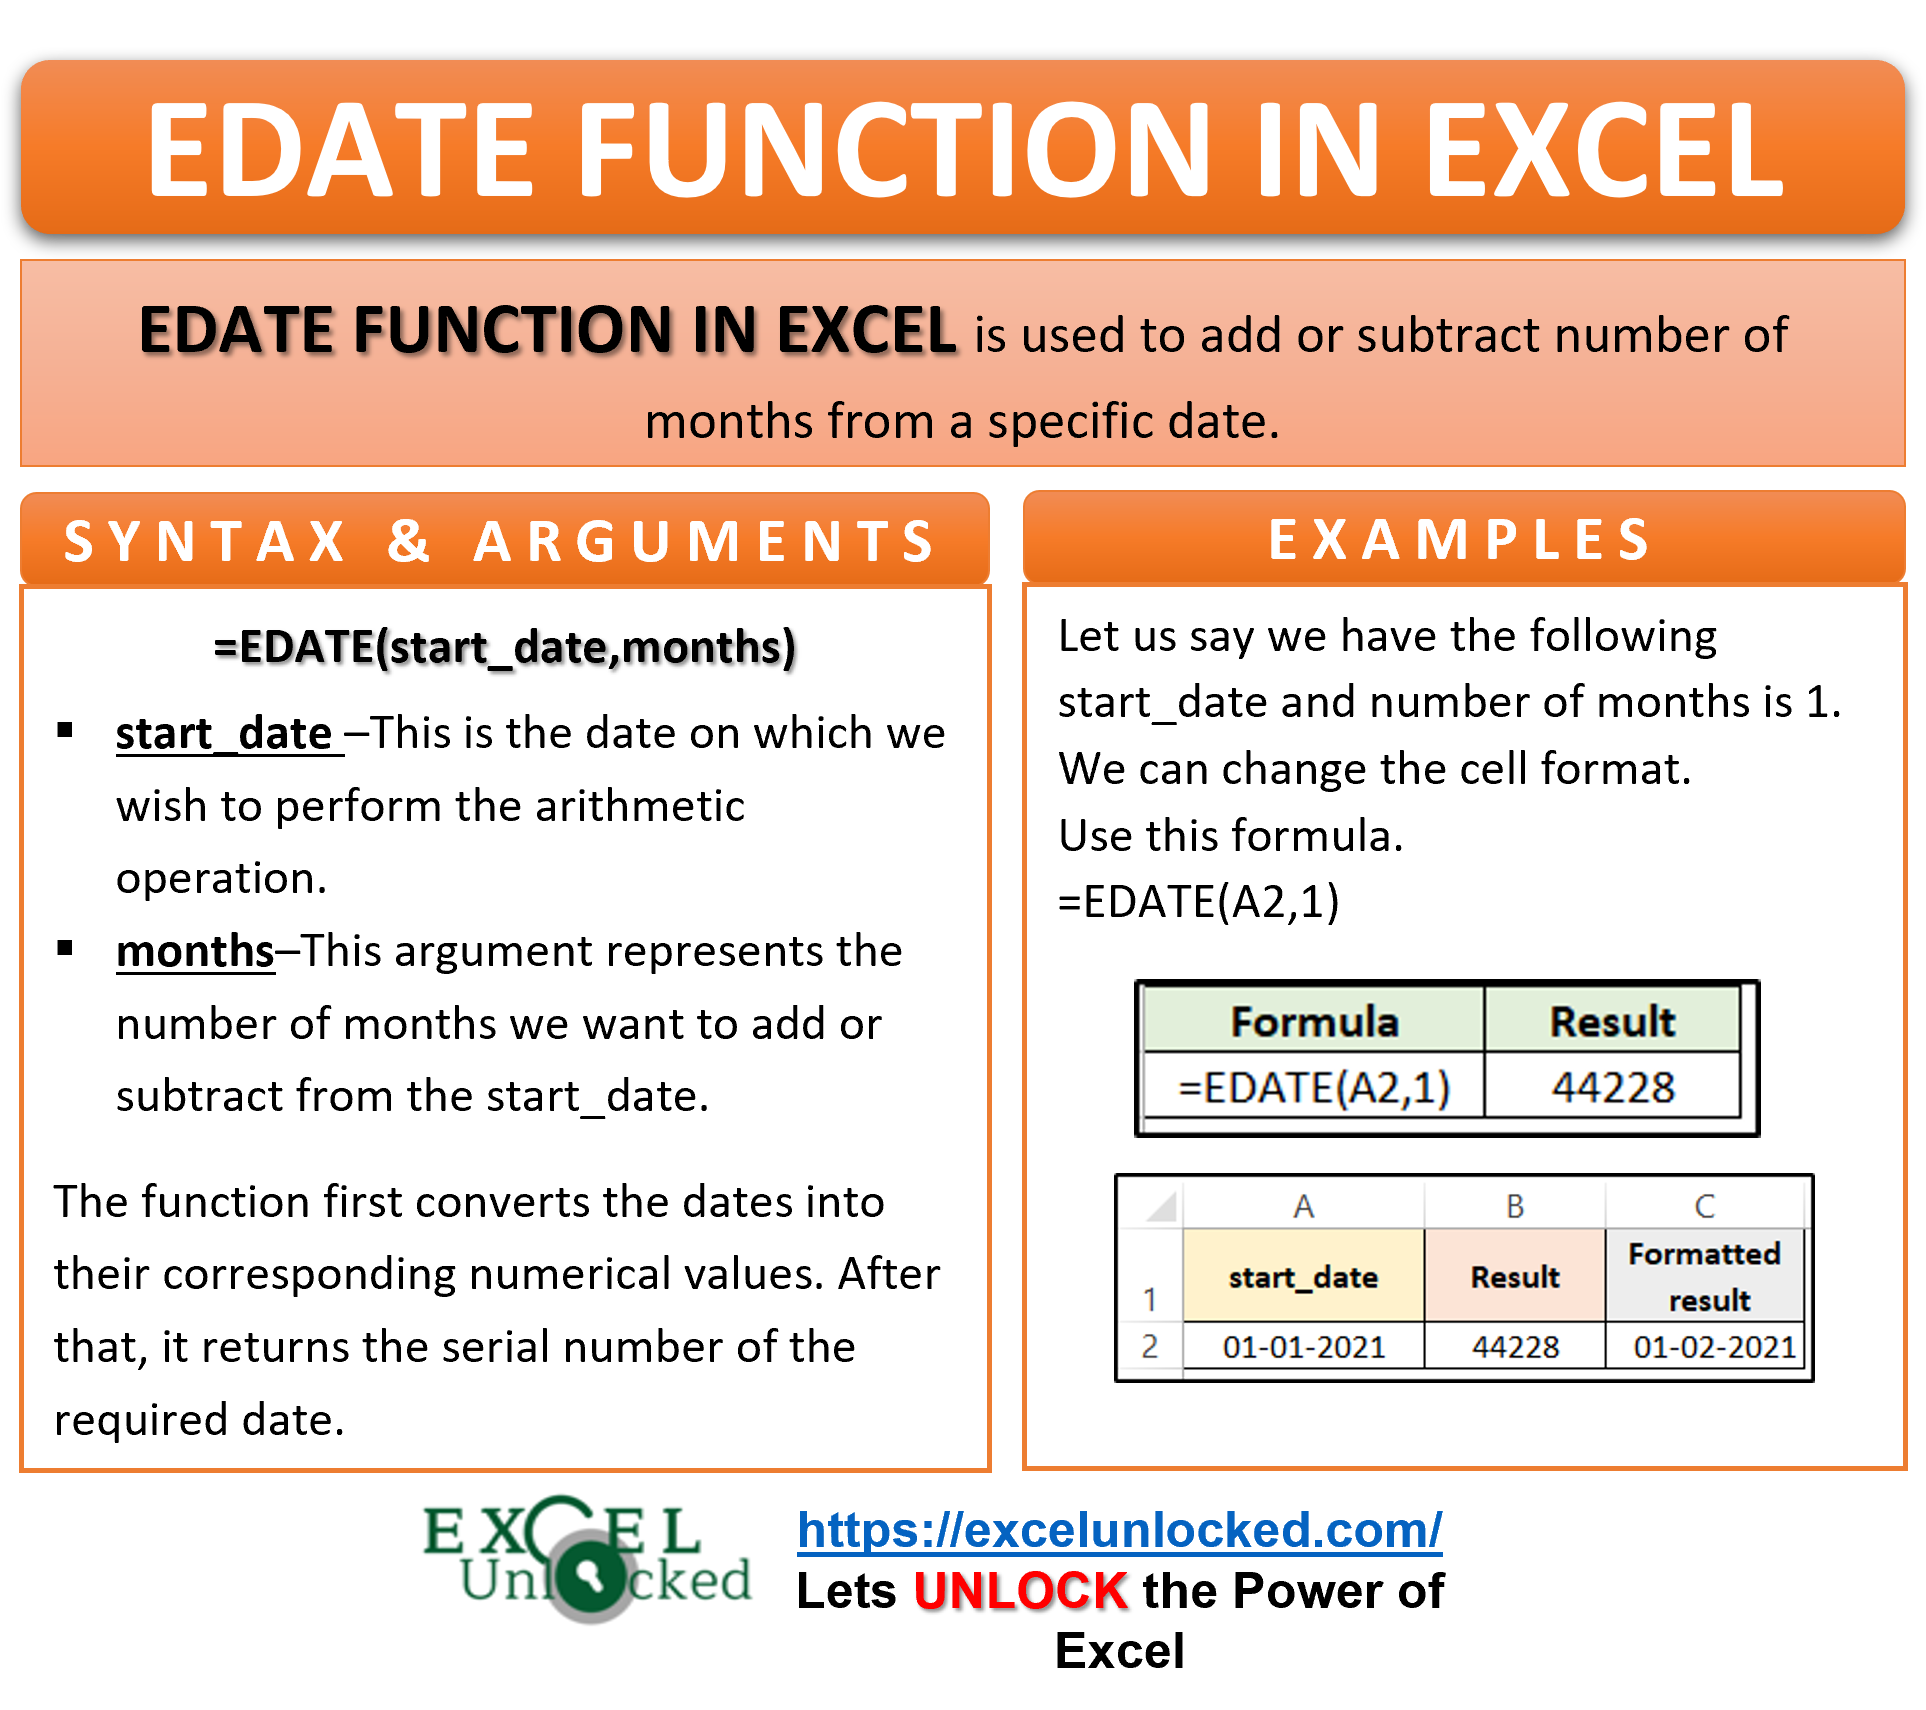
Many times, while working with dates in Excel, you may wish to calculate the upcoming or past date having a difference of a specific number of months. For example, you might want to find the expiry date of a product when given are its manufacturing date and the number of months the product can be used. The EDATE function in excel is very useful in such a case.
Let us now understand the complete usage of the EDATE formula in excel along with examples.
Here we go 😎
When to Use Excel EDATE Function
The EDATE function in excel is used to add or subtract a specific number of months to a particular date. The function performs the arithmetic operation on the date by adding or subtracting the number of months from/to the date.
The EDATE Formula of Excel will return the numerical value. We have to convert it to date number format.
The excel EDATE formula belongs to the date/time function group in excel.
Syntax and Arguments
=EDATE(start_date,months)
The following bullet points explain the excel EDATE function arguments:
- start_date – In this argument, specify the date on which you want to perform the arithmetic operation. You can either add or subtract the number of months from the start_date.
- months – In this argument specify the number of months to add or subtract.
Specify positive months argument for adding the months to date. On the contrary, specify negative months argument value for subtracting the months from date in excel.
Points To Keep in Mind About Excel EDATE Function
The following points should be kept in mind before using the EDATE formula in excel:
- Excel valid dates start from 1 Jan 1900 wherein 1 Jan 1900 represents the numerical value 1. All the dates before 1 Jan 1900 are invalid dates in excel. Therefore, the function returns a #VALUE! error for such invalid dates. Also other invalid dates like 32 Dec 2020 will return #VALUE! error code in excel.
- We can also pass the numerical value of a date as the start_date argument. If the numerical value is unrecognizable value (like 0, or any other negative integer), then the formula will return a #NUM! error.
Examples to Learn the Usage of Excel EDATE Formula
Let us look at some of the practical examples to learn the usage of the Excel EDATE function.
Ex. 1 – Adding and Subtracting Number of Months from Date
The below image example shows dates and the number of months to add/subtract from each of the dates.
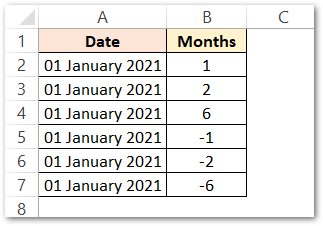
Enter the following formula to get the corresponding results for each of the records:
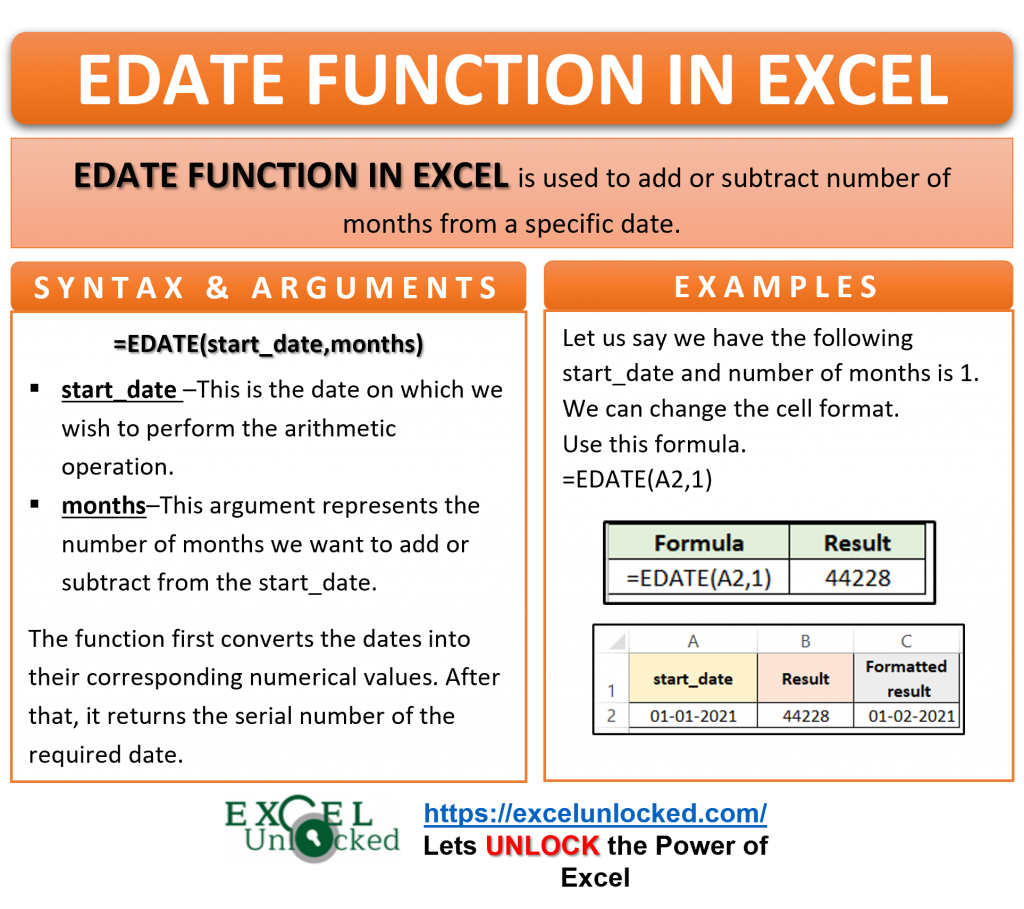
=EDATE(A2,B2)
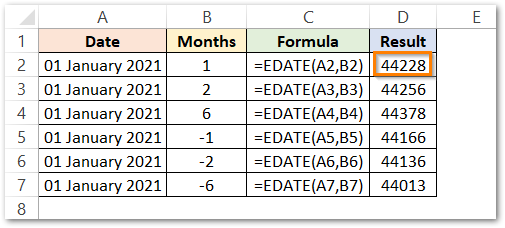
As a result, the function returns 44228. As mentioned earlier, the EDATE function returns the numerical value of the resultant date.
Explanation – We have passed cell A2 as the start_date and B2 as the number of months. The function has added one month to the numerical value of the date 1 January 2021. As a result excel returns 44228 as the output.
To convert the date number into a date format, simply change the format of the cell to a date format. See the below steps:
- Select the data that you wish to change the format of.
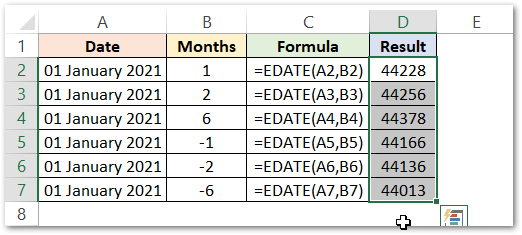
- Press Ctrl + 1 to open the format cells dialog box.
- Under the ‘Date’ category, select the required date format of your choice and choose OK.

As a result, the numerical values get converted into the corresponding dates:
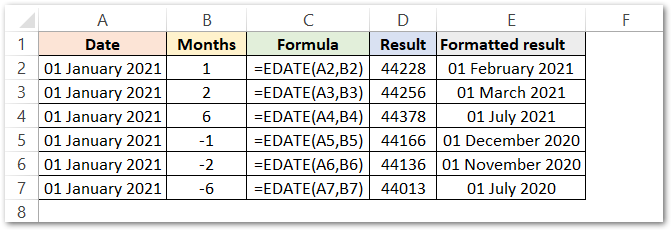
- For the first record, the function has added one month to 1 January 2021 and returns 1 February 2021.
- Similarly, two months were added to 1 January 2021 to get 1 March 2021.
- For the third record, we have added 6 months to the date 1 January 2021 to get the half-year completed.
- In the fourth record, we have subtracted one month from the date 1 January 2021 and the result is a past date 1 December 2020.
- For the Fifth and sixth records, we have subtracted two and six months respectively to get the past dates 1 November 2020 and 1 July 2020.
Ex. 2 – Shifting by Years Using Excel EDATE Formula
Suppose you want to add or subtract a specific number of years to a particular date. To achieve this using the EDATE formula, simply convert the number of years into months by multiplying it by 12.
In the below examples, we have converted 0.50 years, 1 year, 4.5 years, 1.5 years into months and then used the EDATE excel function.
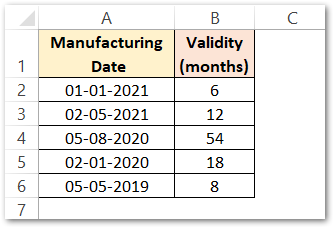
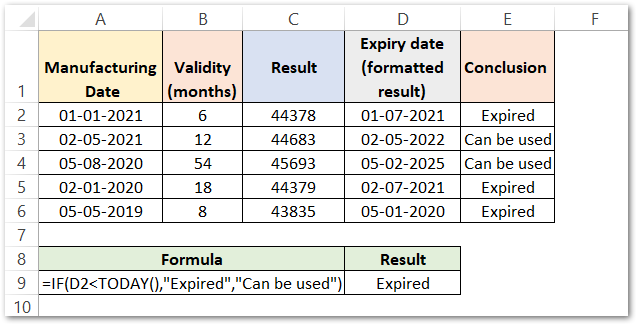
In order to know the expiry date of the above product rows, simply use the following EDATE Formula in excel.
=EDATE(A2,B2)
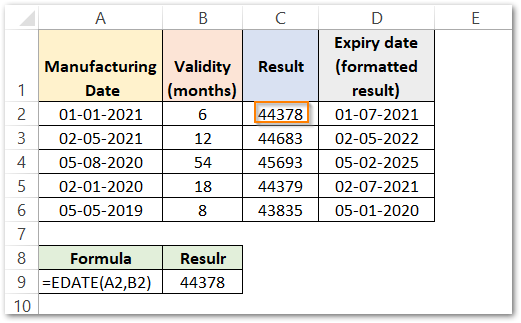
As a result, the function returns 44387. Convert the date number value into date.
Copy the formula in cell C2 to other cells in column C by using copy paste technique or using the fill handle tool.
Further, we can use the Excel IF Formula to know if the product has expired or not by comparing it with today’s date. Use the following formula to get the outcome.
=IF(D2<TODAY(),"Expired","Can be used")
Check our exclusive blog on IF and IFS function in excel to learn more about it.
This brings us to the end of this tutorial on how to use the EDATE function in excel.
Thank you for reading 😉
RELATED POSTS
- DATE Function in Excel – Get Date Using Excel Formula
- DATEVALUE function in Excel – Get Date Serial Number
- Excel DATEDIF Function – Find Difference Between Dates
- DAYS360 Function In Excel- Counting Number of Days
- DAYS Function In Excel – Number of Days Between Two Dates
- Convert Date To Quarter in Excel

