You might have heard about an amazing Excel Fill Handle Tool? Do you know what exactly is this Excel Fill Handle Tool? What benefit does it provide in day to day excel tasks?
Let us understand this excel tool.
Some Basics About Excel Fill Handle Tool
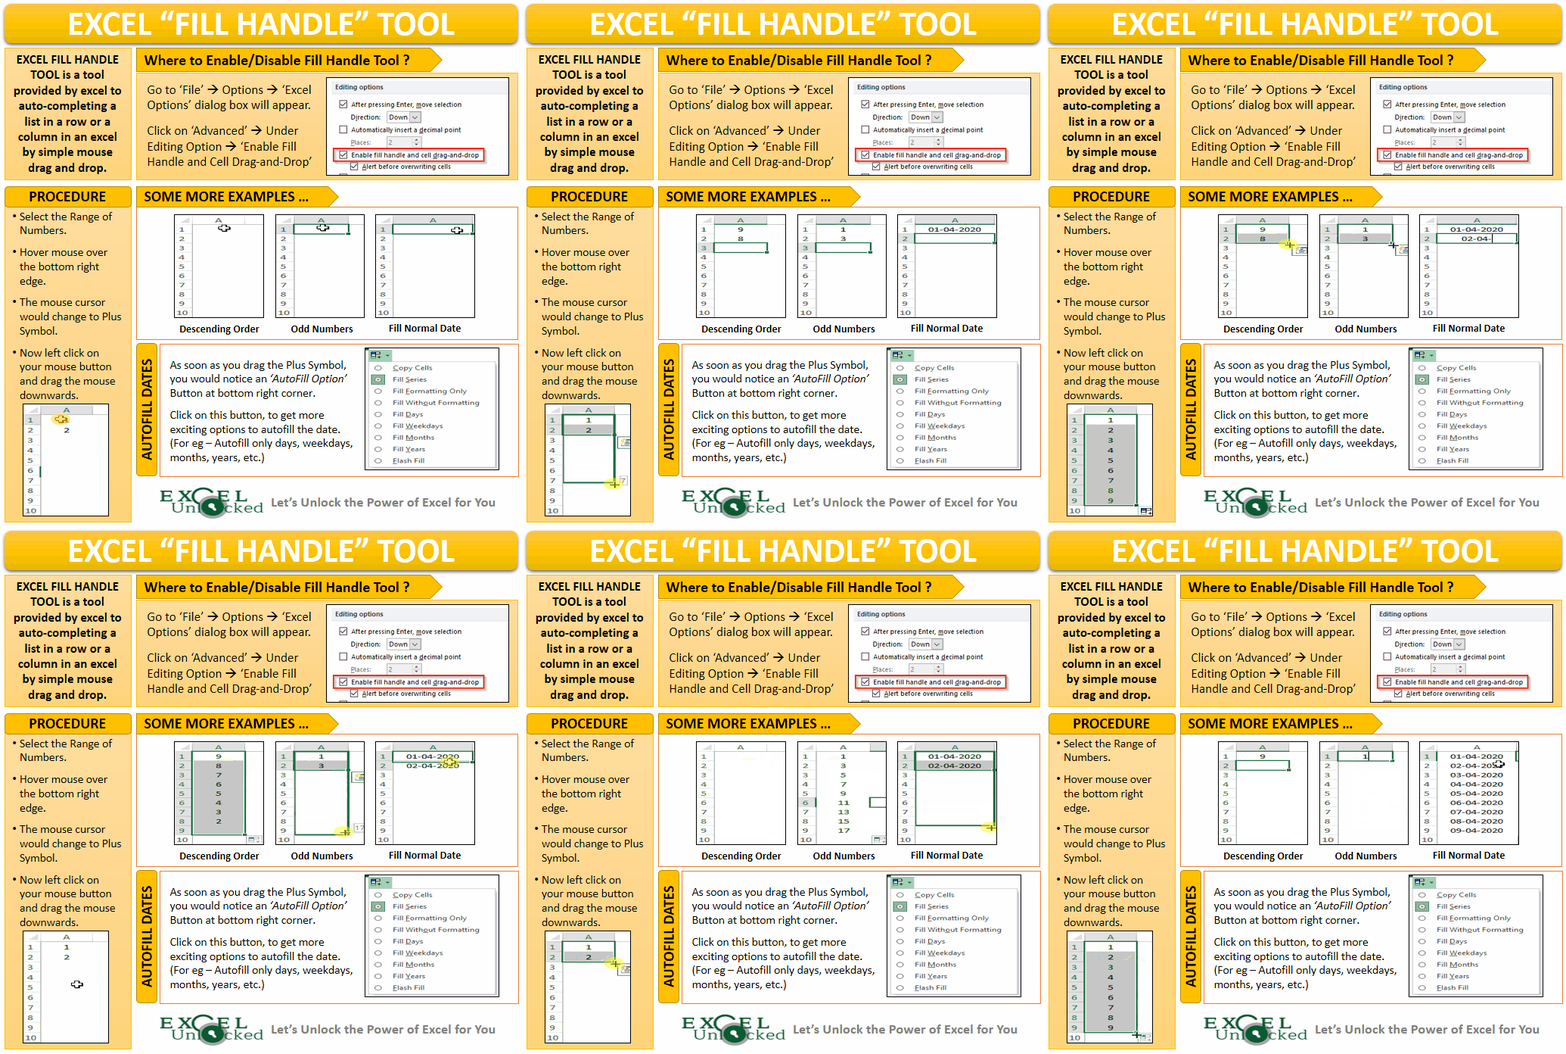
Excel Fill Handle is a tool provided by excel to auto-completing a list in a row or a column in an excel by simple mouse drag and drop.
Let us take one example Suppose, you want the numbers 1 to 10000 in cell A1:A10000 quickly without manually entering the numbers.
In this case, the ‘Fill Handle’ tool will be very useful.
Enabling the Excel Fill Handle Tool
To enable the Excel Fill Handle Tool follow the below path :
Step 1 : Go to “File” then select “Options” as highlighted in the screenshot below :

Step 2 : The “Excel Options” dialog box would open. Select “Advanced” from the list of options available on the left pane for this window.
Under the “Editing Option” area, check the option – “Enable fill handle and cell drag-and-drop”.
Refer the below screenshot :
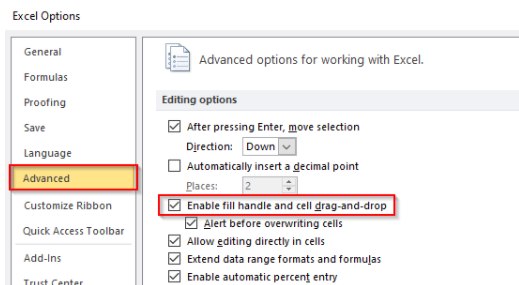
Click on “OK” button.
This would activate the Fill Handle Tool in Excel.
Using the Excel Fill Handle Tool
Before starting with the examples on using the Fill Handle tool, let us first understand where this amazing tool is.
Suppose you have number 1 and 2 in cells A1 and A2 respectively as shown in the screenshot below :
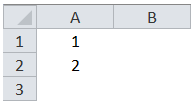
Now to quickly extend this range of numbers upto 10 (without manually entering it), we would take the help of Excel Fill Handle Tool.
Select the range of numbers (i.e. A1:A2) as show in the screenshot below :
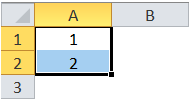
Now Hover the mouse over the bottom right edge of the selected cell. You would notice that the mouse pointer converts into a plus like symbol.
Also Read: Using Flash Fill Functionality in Excel
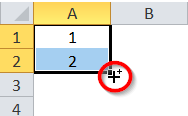
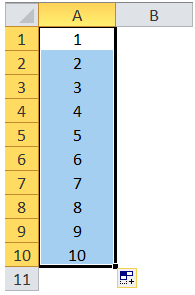
Now left click on your mouse button and drag the mouse downwards. You would notice that as you go drag your mouse down, the values increase by 1. Excel increased the values based on the pattern in the selected data set (A1:A2).
Now release the mouse click once you have the desired values in the cells.
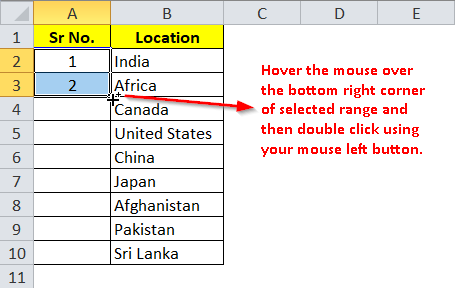
If in case you have some data in the adjacent cell, then instead of using the drag and drop functionality, you can simply hover your mouse over the bottom right corner of the selected data range and then double click using your mouse left button.
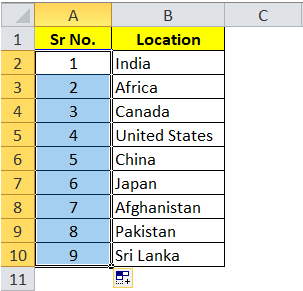
As a result you would notice that the number got extended to the other cells upto A10 (as there is data in cell B10).
Some Examples of Using the Fill Handle Tool
Below are some of the examples where you can use this tool.
Increasing or Decreasing the numbers
As it was demonstrated in the previous section of this blog, you can use the fill handle tool to increase the number by 1.
Similarly you can use the fill handle tool to decrease the number by 1.
Enter the following number 8 and 7 in cell A1 and A2 as shown in the screenshot below :

Select the range of numbers (i.e. A1:A2) as shown in the screenshot below :
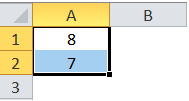
Now Hover the mouse over the bottom-right edge of the selected cell. You would notice that the mouse pointer converts into a plus like a symbol.
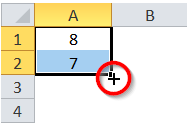
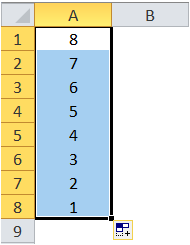
Now left-click on your mouse button and drag the mouse downwards. You would notice that as you go drag your mouse down, the values decrease by 1. Excel decreased the values based on the pattern in the selected data set (A1:A2).
Now release the mouse click once you have the desired values in the cells.
Auto Filling the Weekdays (Short as well as Full Name)
Enter the following sample data in excel
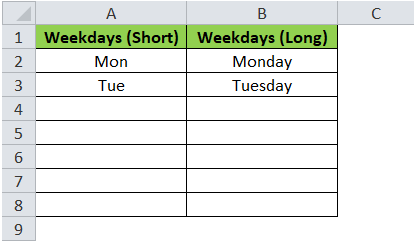
Select the range A2:A3 (i.e. Mon and Tue) as in the screenshot below :
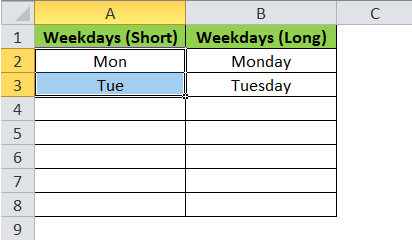
Hover the mouse over the bottom-right edge of the selected cell. You would notice that the mouse pointer converts into a plus like a symbol.
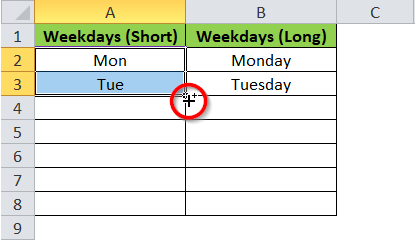
Now left click on your mouse button and drag the mouse downwards. You would notice that as you go drag your mouse down, the weekdays get autofilled.
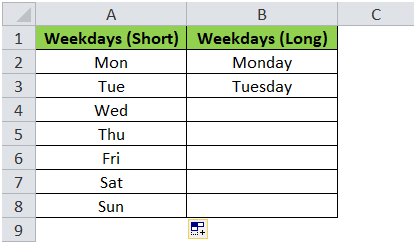
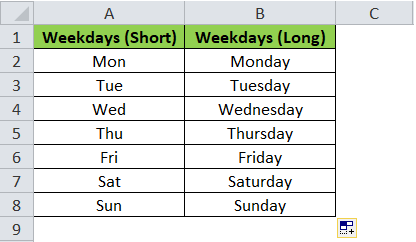
Similarly, we get complete weekdays using the Fill Handle Tool of Excel.
Autofill Dates
You can use the Fill handle tool to autofill the dates in excel cells.
Just enter two dates in cell A2 and A3 and then select those cells as shown in the screenshot below:
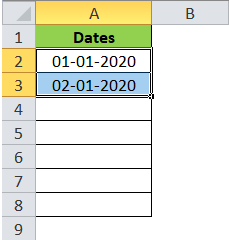
Now, take your mouse to the bottom-right corner of the selected cell range. You would notice that the mouse pointer converts into a plus like a symbol.
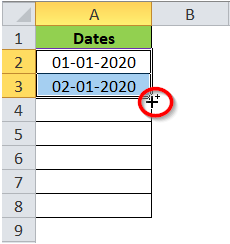
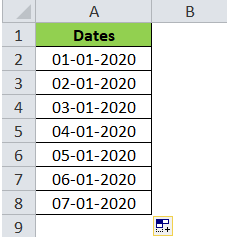
Now left click on your mouse button and drag the mouse downwards. You would notice that as you go drag your mouse down, the dates get autofilled.
This brings us to the end of this blog. Let me know your view and thoughts by leaving your comments below.
