In our previous blog, we learned some basics of ‘Comments’ in Excel. In continuation, here I am publishing a bonus trick on Excel Comments Feature, where we would learn about the more exciting thing that we can do with the Comments in Excel. This bonus trick on Excel Comments Feature would help you customize the excel comment box as your requirement.
Before reading this blog, I would strongly recommend that you should go through my earlier blog on ‘All About Comments in Excel’ to learn some basics about Excel Comment Feature and various other things that you can do with the Comments feature of Excel.
So, without taking much of your time, let us now begin with this bonus trick.
What is This Bonus Trick on Excel Comment Feature?
Whenever you insert any new comment in a new excel workbook, you would notice that Excel inserts a default comment with its background color as ‘Light Yellow and a black border.
See the below image.
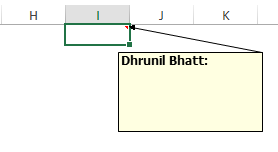
Like we saw in our previous blog, with the ‘Format Comments’ option in Excel, we can easily change the background color as well as the comment border style from the excel standard provided options
But what if you want your excel comment border to look like this.

EXCELUNLOCKED CHALLENGE FOR YOU – Try making a comment as shown in the screenshot above using standard excel comment option.
Here is how you can achieve this.
Steps to be Performed
Creating the Picture of the Comment Border
Open “Microsoft Powerpoint (PPT)” on your system.
Go to the “Insert” tab, under the group “Illustrations”, click on the “Shapes” option

From the list of available shapes (in the drop-down option), select the shape of your choice. I am choosing ‘Pentagon’ from the list of available shapes.
The mouse cursor would change in a plus symbol. Click anywhere on the Powerpoint slide (do not release the mouse click) and drag it to form the shape.

Now change the ‘Shape Fill’ to “No Fill” (so that the text written in the comment is visible). Also, change the border thickness and color as per your choice.
Also Read: All About “Comments” in Excel
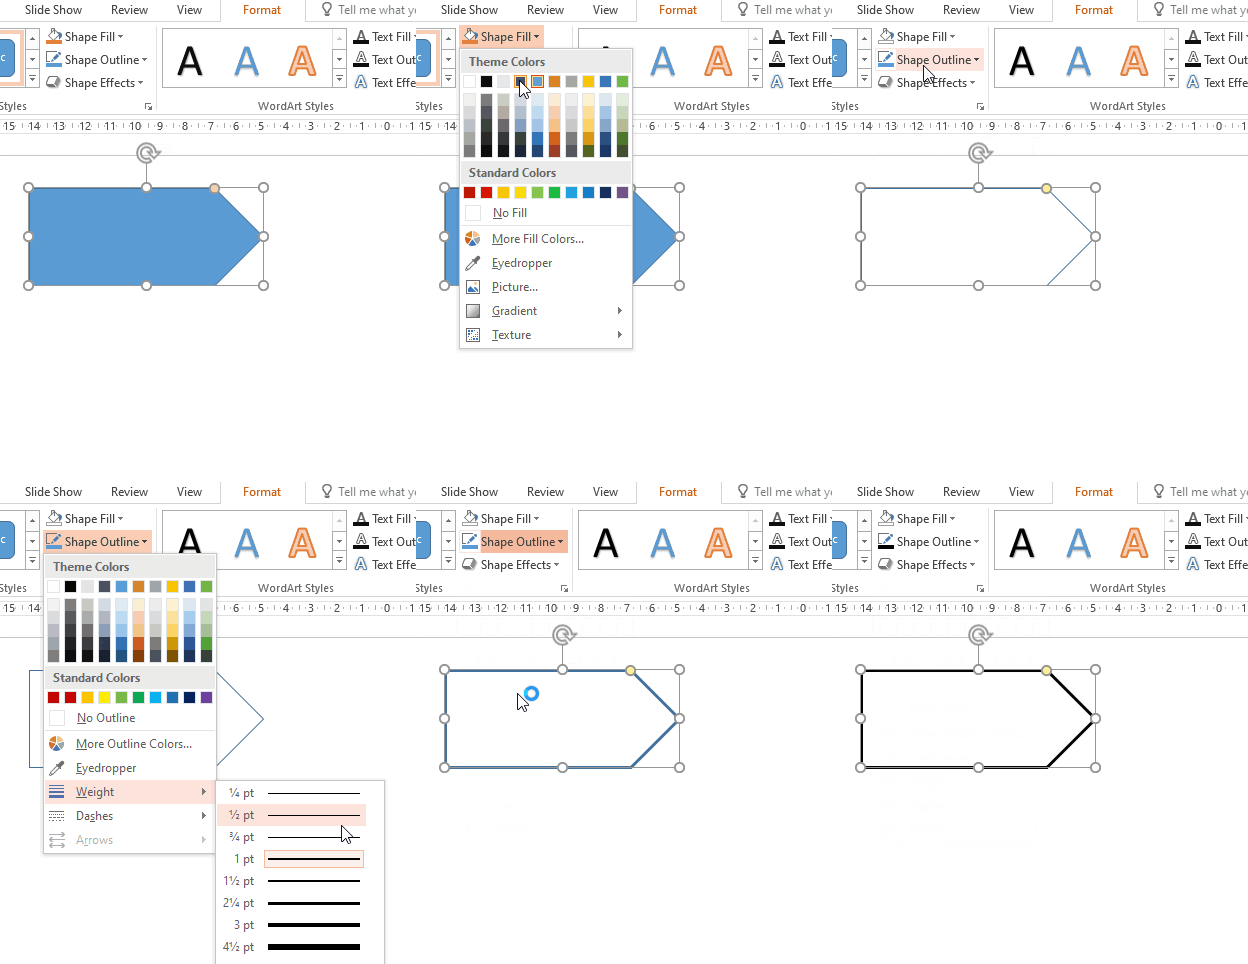
Now click on the border of this shape and right-click on your mouse. Select the option “Save as Picture” from the list of options available drop-down list.
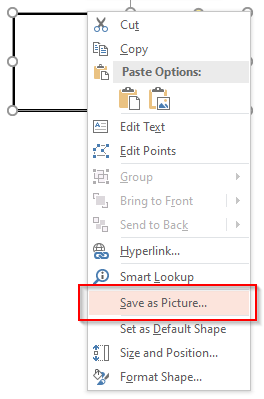
Choose the path to save this image in your system. Make sure that you save it as a .png file.
Let us now go back to our Excel worksheet.
Formatting the Comment Border in Excel
In the Excel file, click on the comment box for which you want to change the shape.
Now, hover your mouse to the borders of the comment box till the cursor changes to a plus like a symbol with arrows on it.
Now Right-click on the borders of the comment box and select the option ‘Format Comments’.
The ‘Format Comments’ dialog box would appear on your screen.
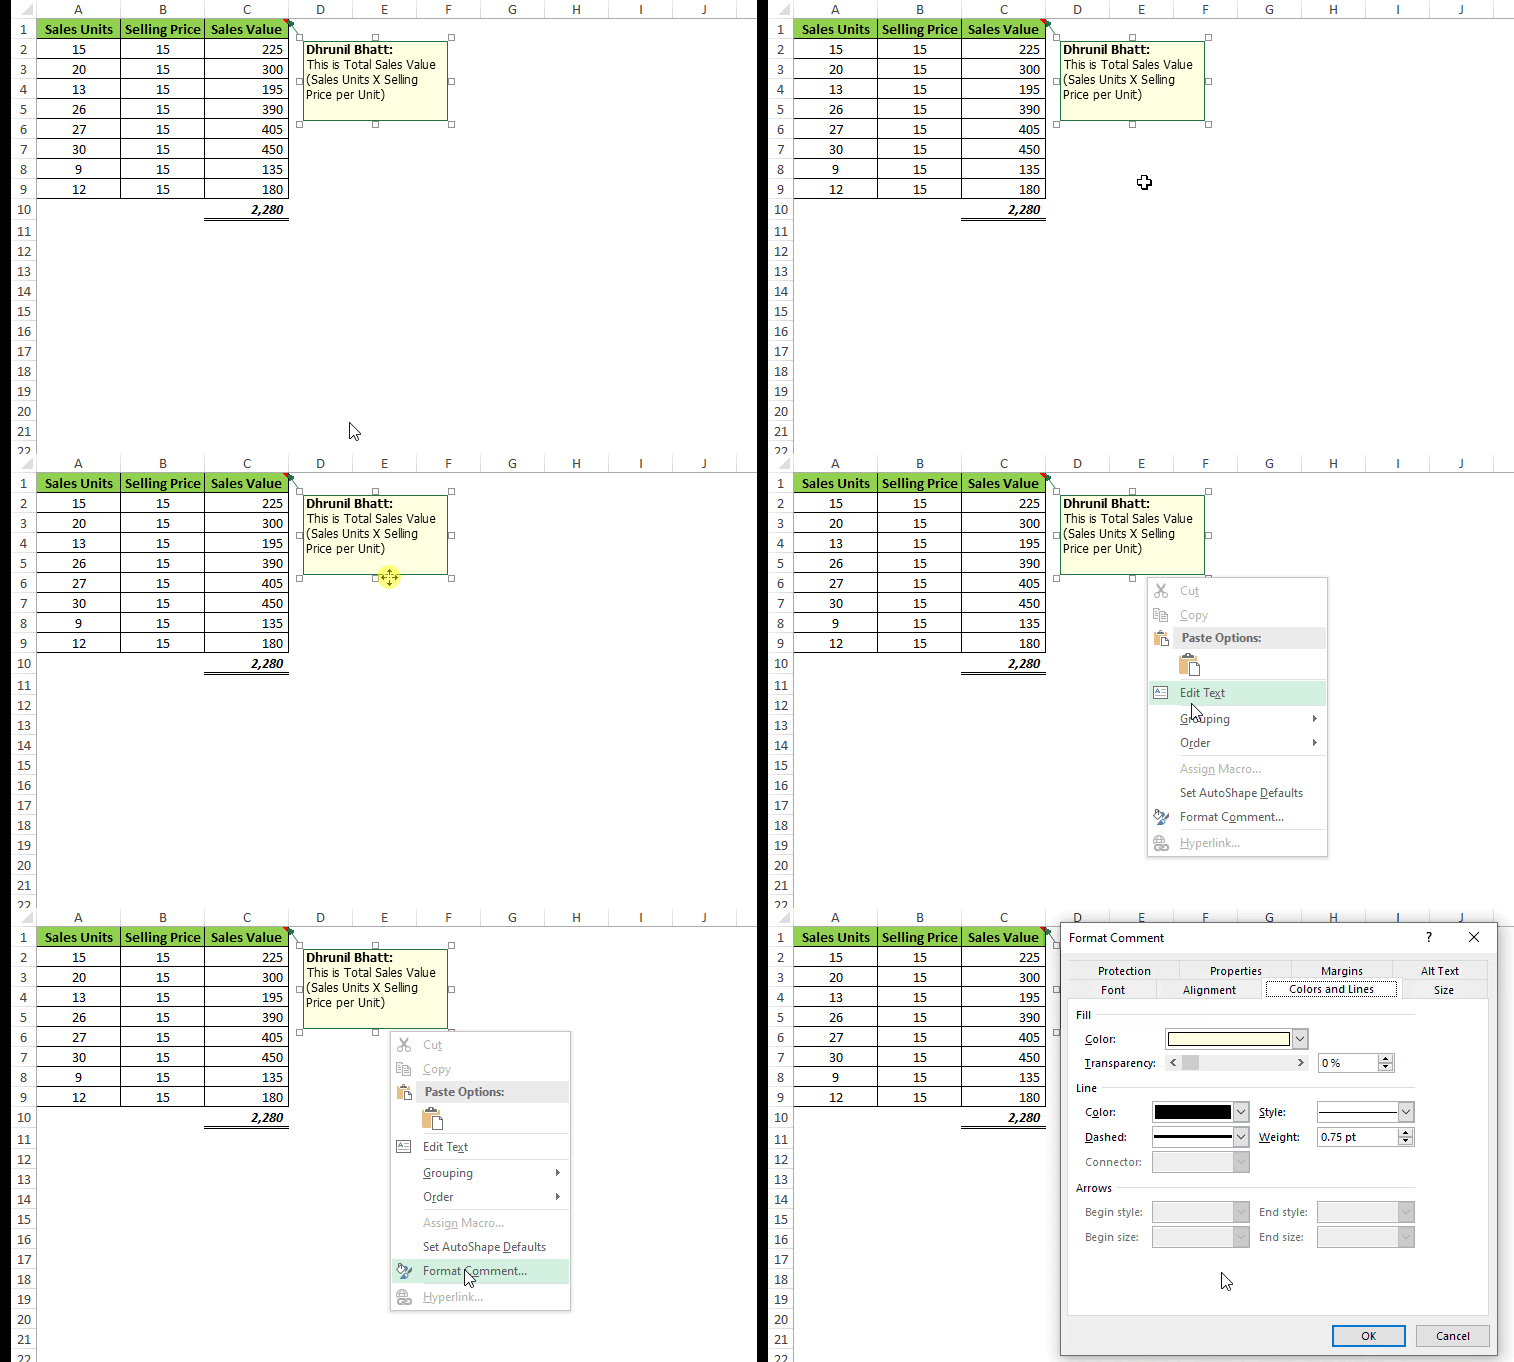
Go to the tab ‘Color and Line’. Under the ‘Fill’ Section of this tab, click on the down-arrow in the Color and click on the option ‘Fill Effects’.
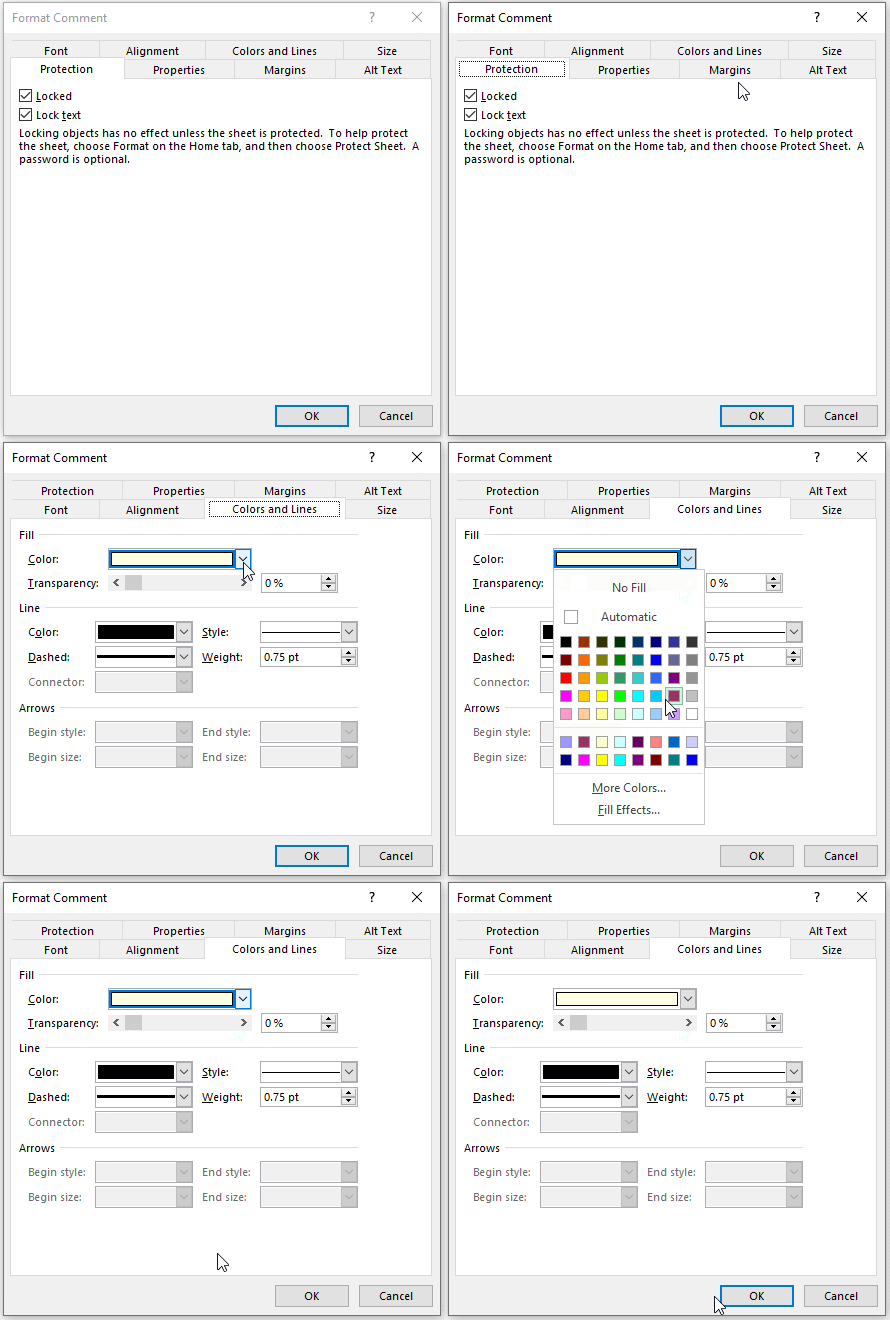
The ‘Fill Effect’ dialog box would appear on your screen. Go to the ‘Picture’ tab. Here, click on the button ‘Select Picture’ and select the image that we have just saved.
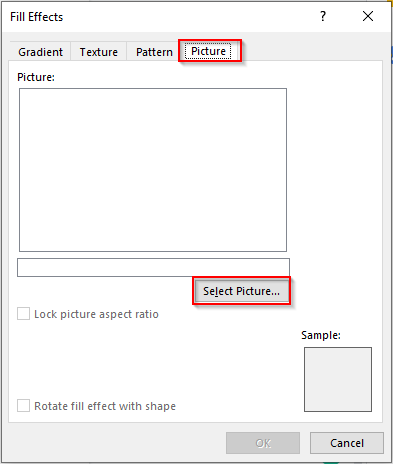
Once you have selected the image, the .png image would appear as below:
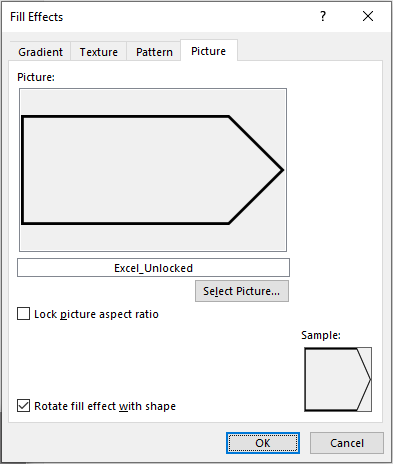
Click on the ‘OK’ button to activate this feature.
The comment box would not look like this:

Now let us make some cosmetic changes to the comment box.
Again, open the ‘Format Comment’ dialog box. Under the tab ‘Colors and Lines’, select the option ‘No Lines’ as demonstrated in the screenshot below:
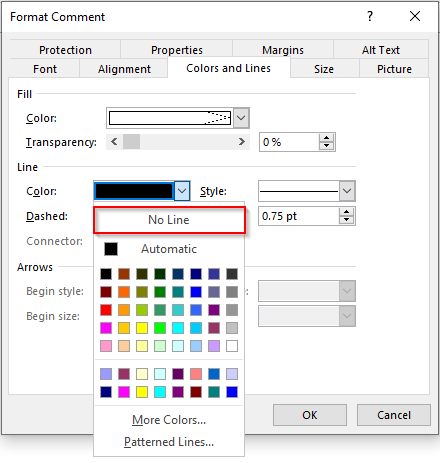
And click on the ‘OK’ button to activate this option.
As a result, this would remove the borders from the comment box.

As you can see the content in the comment box still overlaps its outer border. Let us adjust the margin in the comment box.
Go to the ‘Margin’ tab and make the settings as shown below and press the “OK” button to activate.
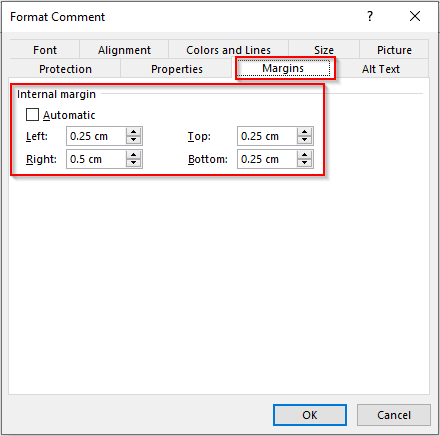
Now you can see that the content fits perfectly into the Comment Box.
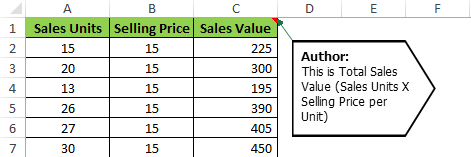
This brings us to the end of this blog. Hope you have enjoyed this bonus trick on Excel Comments.

