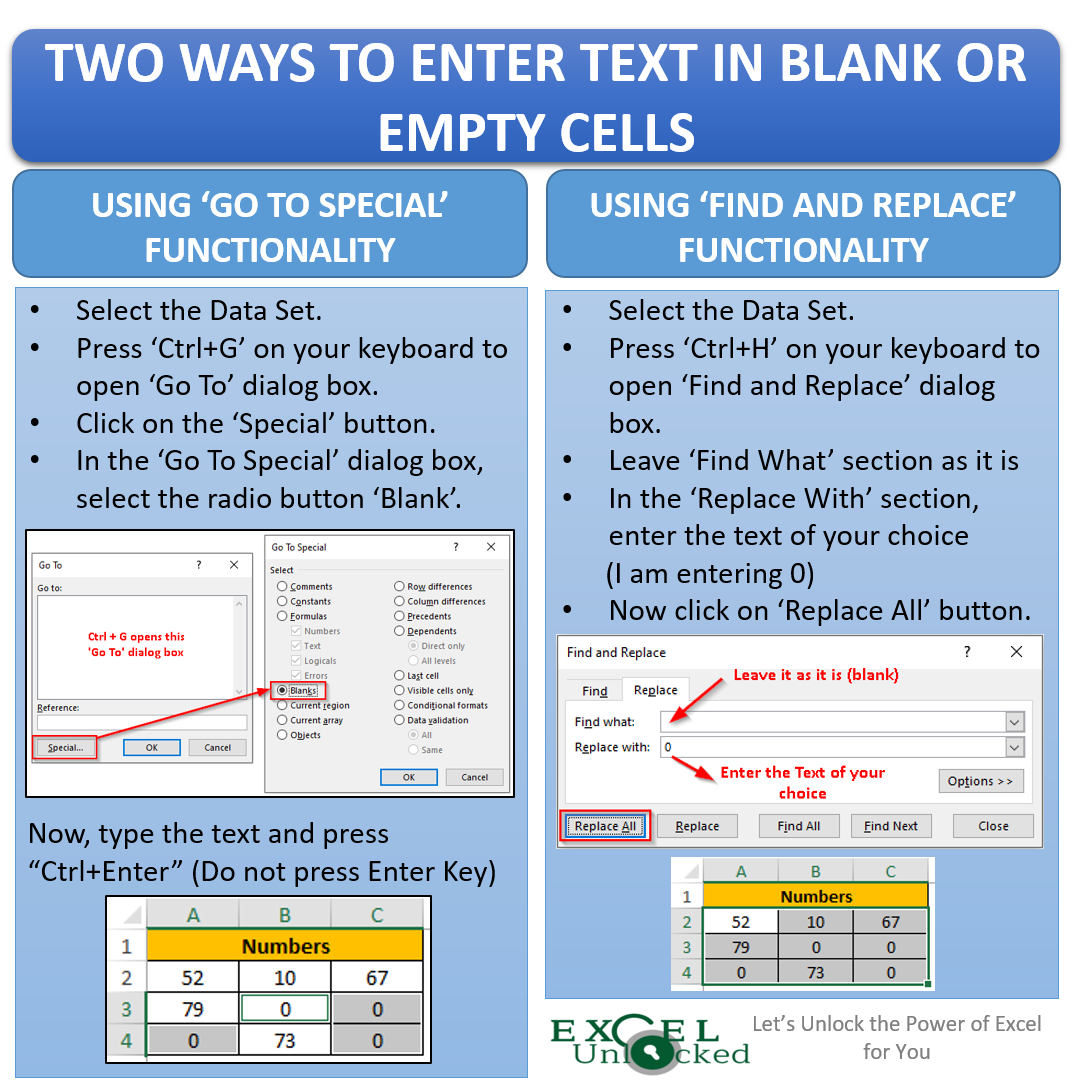
Do you know how to enter the text in blank cells in Excel? Many a time, while working with data in an Excel Worksheet, you may face the need to enter a specified text or a number in the blank or empty cells. One way is to go to each of the blank cells one by one and enter the required text. But no one would like to use this way as it takes a lot of time and is a quite tiresome task. So, what is the solution? How can you enter the text in blank cells in one go?
Basically, there are two simple ways that you can use to enter text in the empty cells in Excel.
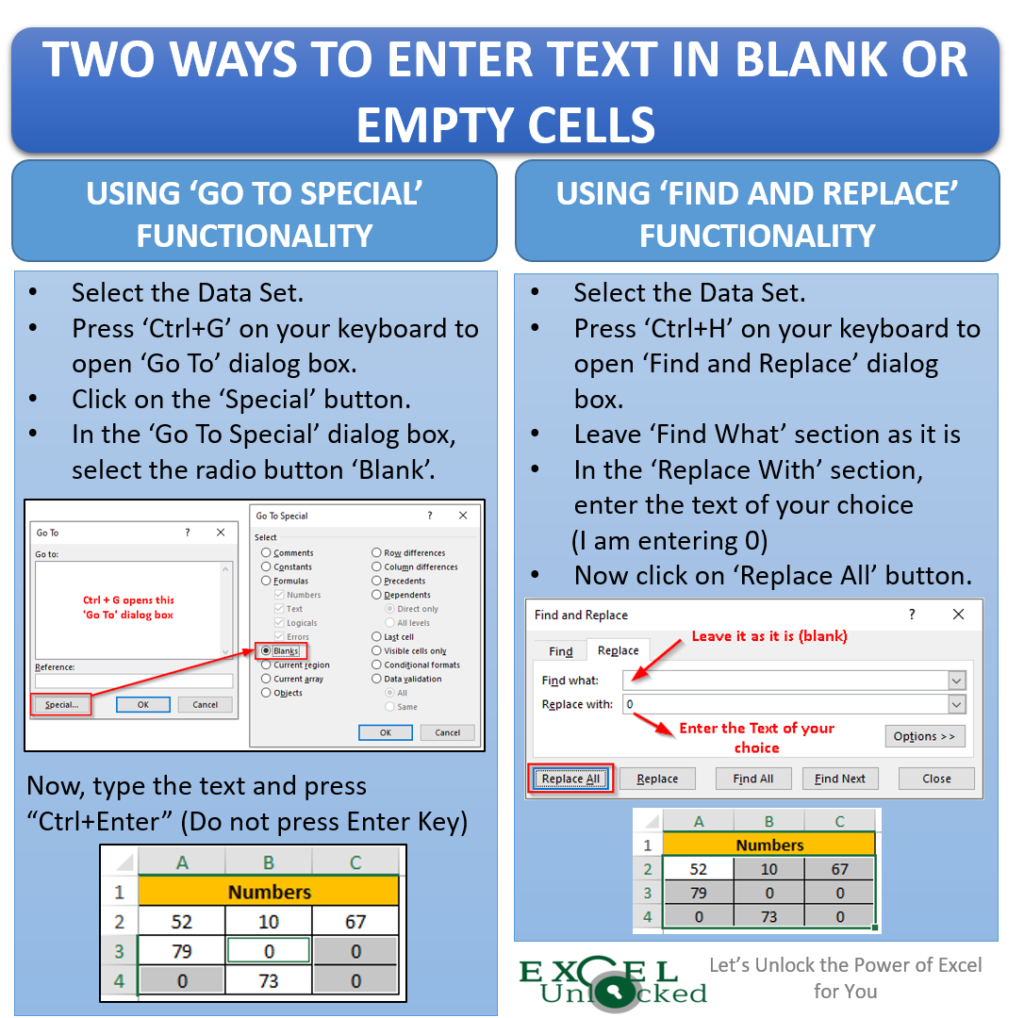
The first one is by using the ‘Go to Special‘ dialog box option and another one is by using the ‘Find and Replace‘ Functionality.
Sample Dataset Containing Blank Cells
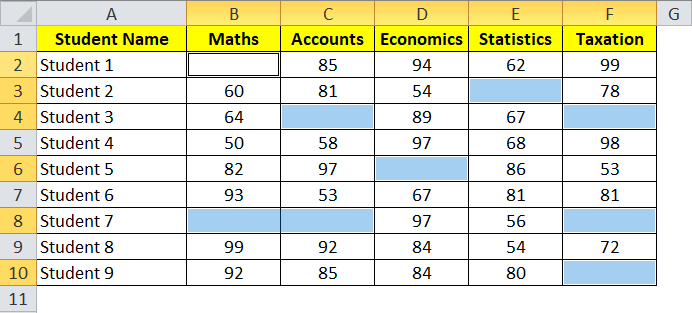
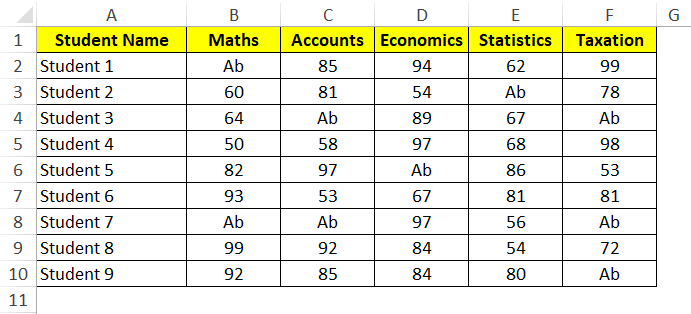
Let us suppose you have an Excel table containing marks received by various students in different subjects. Refer the below example screenshot :
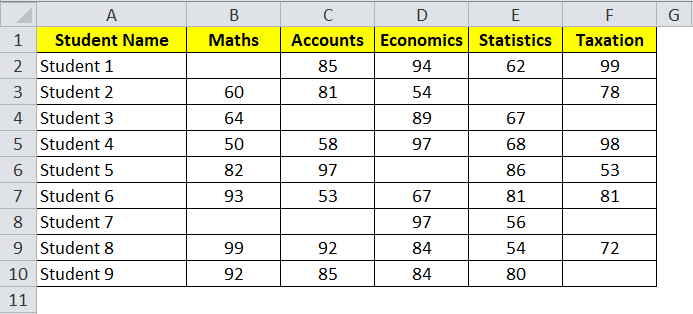
Now you want that all the blank (empty) cells (B2, E3, C4 and so on) should get filled with the word “Ab” (denoting that the student was absent in that examination paper).
Manually selecting each of the blank cells one by one and writing “Ab” is not an advisable job.
Let us now go through each of the two methods one by one.
Enter Text in Blank Cells – ‘Go To Special’ Feature
This is a two-stepped approach: Firstly we would select ONLY blank cells and then, in the next step, we would enter the word “Ab” in a single click.
Let’s understand each of the above steps in detail :
Selecting the blank cells (ONLY)
Before entering the word “Ab” into the blank cells, we need to make sure that only blank cells are selected for data entry.
To select all the blank cells at one go, follow the below procedure :
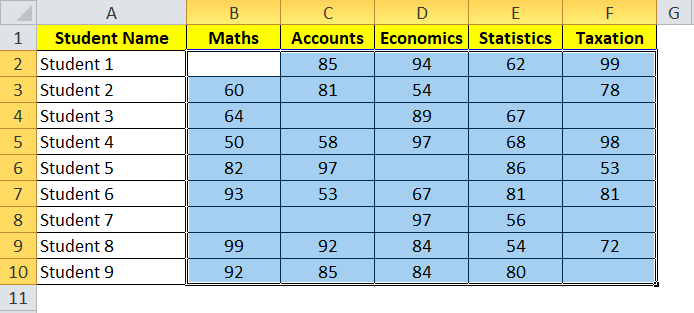
Firstly, select the entire table as shown in the picture below.
Open the “GoTo” Dialog box (by pressing Ctrl+G or F5 key on your keyboard). And click on the “Special” button to get the “Go To Special” dialog box.

Now, select the radio button “Blanks” as highlighted in the screenshot below and click on “OK”.
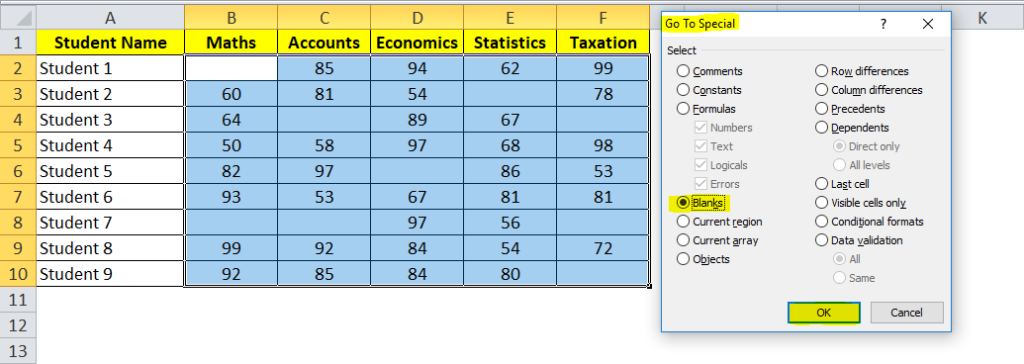
As soon as you click “OK”, you can see that all the blank cells in the table get selected leaving the other filled cells as it is.
Entering the word “Ab” in the selected blank cells
Once step 1 is completed and all the blank cells get selected, we shall now enter “Ab” in those cells at one go.
Follow the below steps :
Type word “Ab”, but do not press enter. (In the case where you press the enter key, the text “Ab” would update in only one of the selected blank cells and not in all the blank cells.)
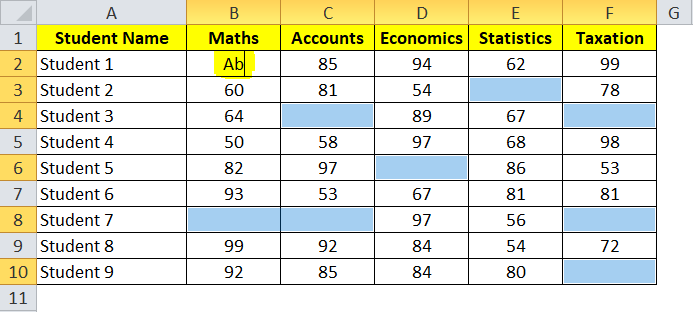
Now, press Ctrl + Enter. (Ctrl + Enter helps to update the text in all the selected cells at one go)
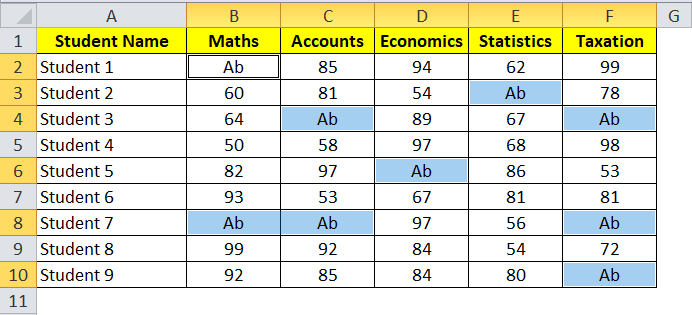
You can see that the word “Ab” updates in all the selected blank cells.
This brings us to the end of the first method. Let us now unlock the other method in which we would select the blank cells using the ‘Find and Replace’ functionality of Excel.
Enter Text in Blank Cells – ‘Find and Replace’ Function
Follow the below steps to Enter a text or number in Empty Cells in Excel using the ‘Find and Replace’ functionality of Excel.
Firstly, select the entire table as shown in the picture below.

Now, press Ctrl+H on your keyboard to open the ‘Find and Replace’ dialog box.
Keep the ‘Find What’ section of this dialog box as it is (blank) and in the ‘Replace With’ section, enter the text ‘Ab’ (you may enter the text or number of your choice).
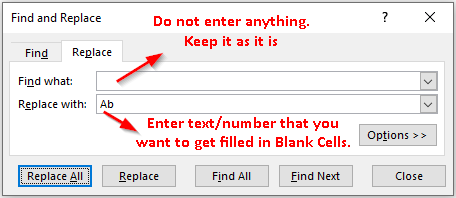
Now click on the ‘Replace All’ button.
As soon as you click on the ‘Replace All’ button, you would notice that Excel fills the blank cells with the word ‘Ab’ (or with the word that you have entered in the ‘Replace With’ section of the dialog box).
This brings us to the end of this blog. Share your view and suggestions in the comment section below.

