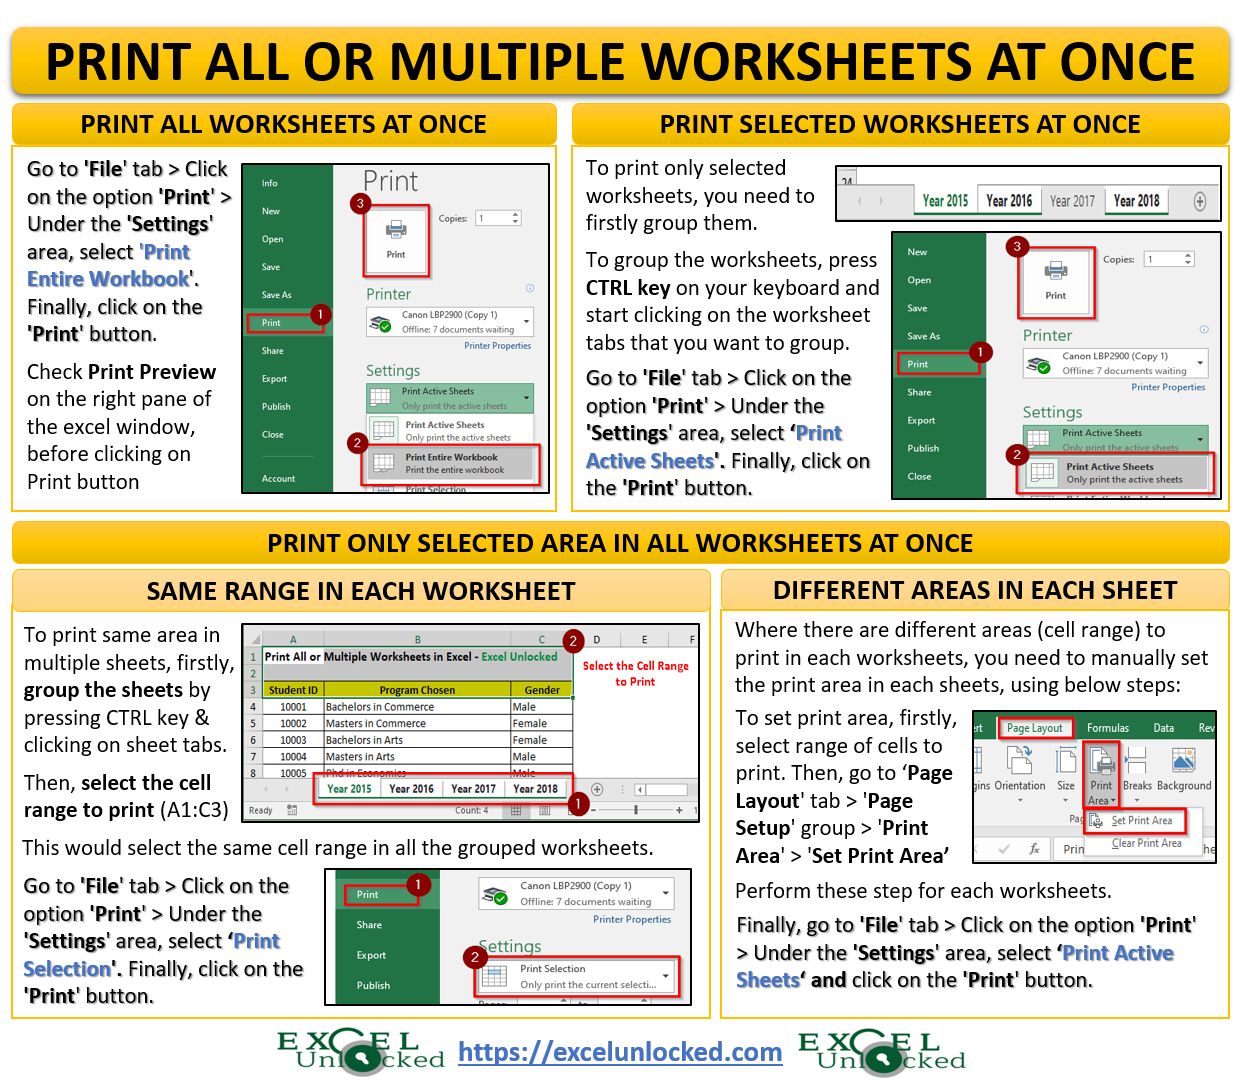
When you are working with a large workbook having multiple worksheets in it, one concern that comes in mind is about printing all or selected worksheets in Excel. In this blog, we would unlock the technique to print multiple worksheets (maybe all worksheets or some selected worksheets) at one go in Excel. We would also learn how to print a specific area or range of cells in all/selected worksheets in Excel.
So let’s get started with each of the questions raised above.
Sample Data – Print All or Multiple Worksheets in Excel
The below image shows the sample workbook where there are multiple worksheets in a workbook, each of which contains some data in it. We would be using this sample data throughout this blog.
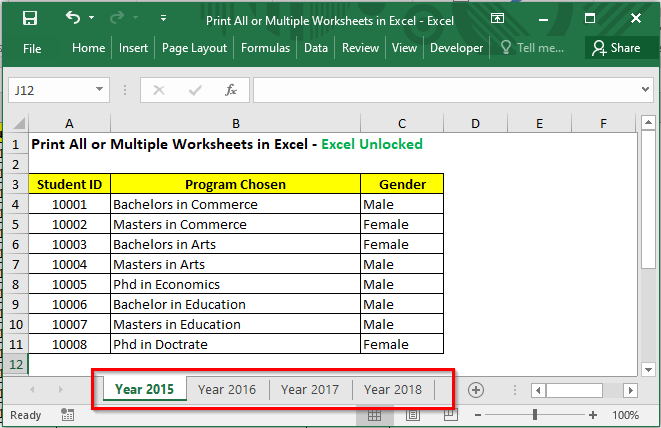
Download the sample file using the ‘Download’ button below and practice as you read.
Print All Worksheets in Workbook At One Go
To begin with, let us first look into how to print all data in all the worksheets in the workbook at one go.
Pre-requisite for this – Print area should not be set in any of the worksheets. To clear or remove the print area in excel, follow the path – ‘Page Layout’ tab > ‘Page Setup’ group > ‘Print Area’ option > ‘Clear Print Area’.
Also Read: Printing Comments in Excel – Quick Guide
Perform this step for each of the worksheets in Excel.

Now, to print all the worksheets in the workbook at once, follow the below navigation path:
Go to ‘File‘ tab > Click on the option ‘Print‘ > Under the ‘Settings‘ area, select ‘Print Entire Workbook‘. Finally, click on the ‘Print‘ button as shown in the image below:
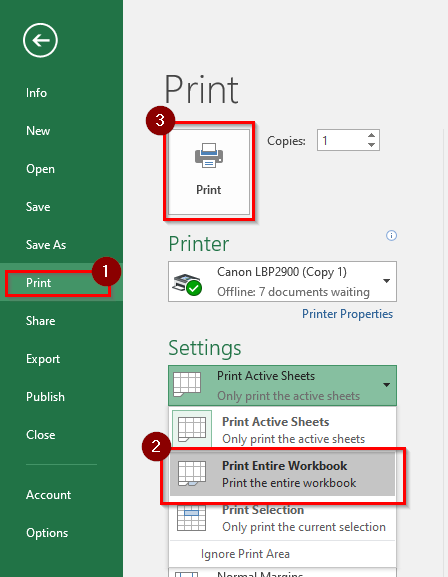
This would print all the worksheets quickly at one go, without going to each and every worksheet and print.
Before finally clicking on the ‘Print’ button (Point 3 in the image above), you can check the print preview on the right pane of the excel window, and make necessary margin settings if required.
But what if, you do not want to print all the worksheets, but only the selected worksheets in the workbook.
Print Selected Worksheets in a Workbook At One Go
Follow the below steps to achieve the same:
The first and foremost step is to select and group all the worksheets that you want to print at once. To group only specific worksheets, press the CTRL key and click on each of the worksheets one by one.
The grouped worksheets would have white color on its tab. All these worksheets are now active worksheet.

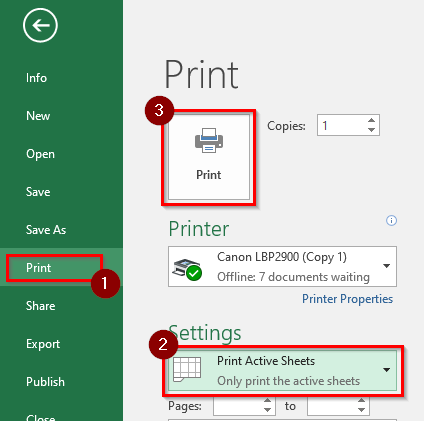
Finally, navigate to the following path to print the selected worksheets:
Go To ‘File‘ ribbon tab > Click on ‘Print‘ option > Under the ‘Settings‘ area, select ‘Print Active Sheets‘.
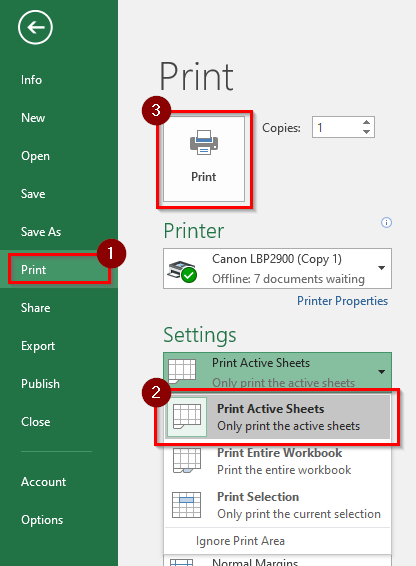
Once the selected worksheets are printed, it is very important to ungroup the worksheets back. To ungroup, right-click on any of the worksheets and click on the ‘Ungroup Sheets‘ option.
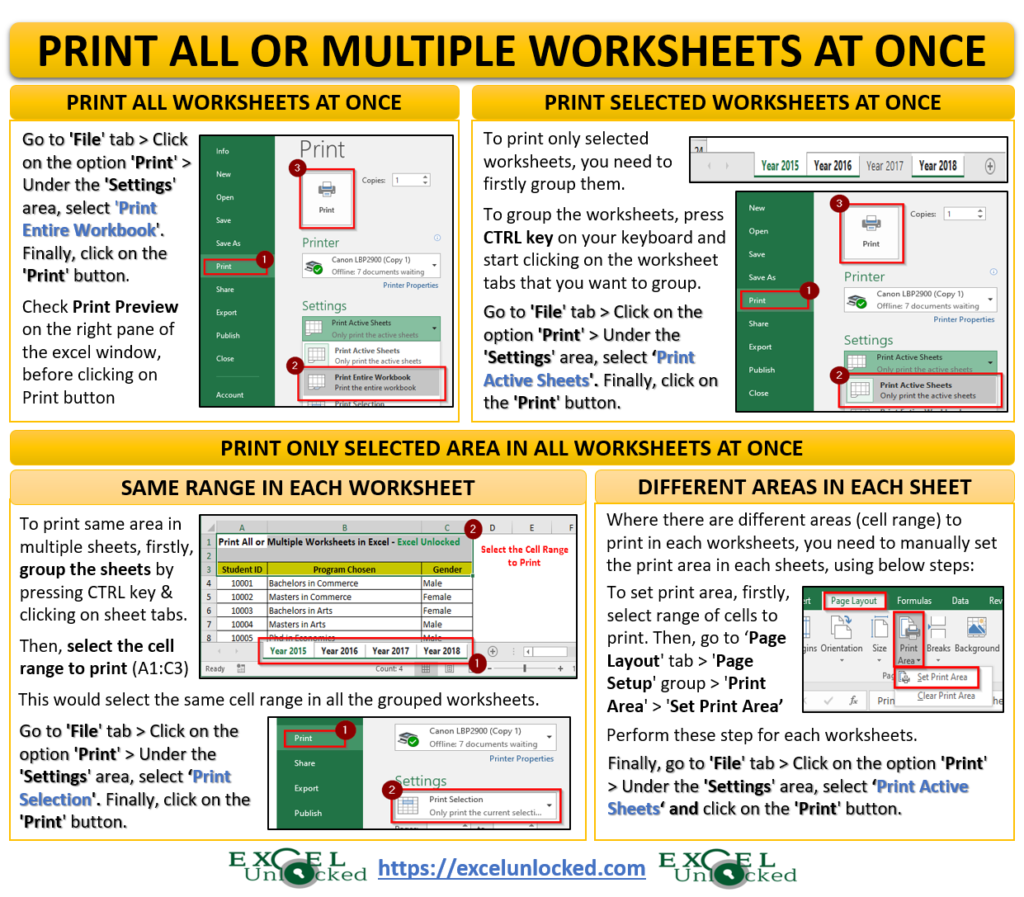
Print Only Selected Area Within Worksheets in Excel
Many a times, you may with to only print a specific range of cells in each of the worksheets in Excel. If the cell range is same in all the worksheets, then its easy to achieve the task. Follow the undermentioned steps:
Firstly, group the selected or all the worksheets (as the case may be), by pressing CTRL key on your keyboard.
Once the sheets are grouped, simply select the cell range (lets say in our case it is A1:C3).
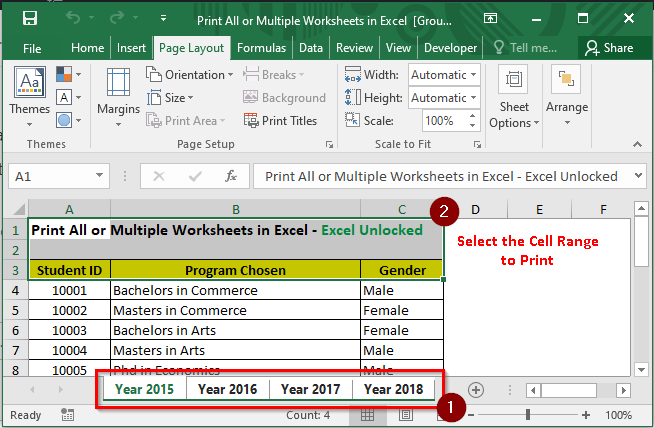
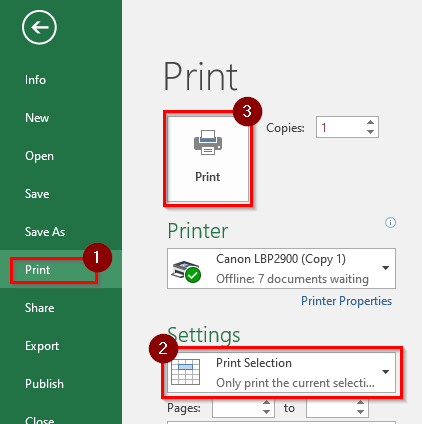
Now, go to File ribbon tab > Print option > Under the ‘Settings‘ area, select the option ‘Print Selection‘ and finally click on ‘Print‘ button.
If you wish to print different area (range of cells) in different worksheets in the workbook, you need to firstly set the print area manually in each of the worksheets.
To set the print area, select the range of cells that you wish to print. Now, go to the ‘Page Layout‘ ribbon tab and under the ‘Page Setup‘ group, click on the ‘Print Area‘ option > ‘Set Print Area‘.

The above steps needs to be done manually for each of the worksheets one by one.
Once the print area is set for each of the worksheets, simply use the ‘Print Active Sheets’ option to print the area.
With this we have reached to the end of this blog. Share your views and comments in the comment section below.

