We already know how to change the text alignment of cells in excel. Today we will learn how to change the horizontal as well as vertical text alignment of cells with the help of VBA.
So let us start learning.
Change Cell Alignment in Excel
Normally, we can change the alignment of cells from the Excel ribbon. All we need to do is select the range of cells whose alignment we wish to change and then go to the Alignment Group on the Home tab on the ribbon. There you will find the option to horizontally align the text.

You can change the vertical cell alignment from the Format Cells Dialog box. Select the range of cells and press the Control and 1 key to open the Format Cells Dialog box. You can change the Horizontal as well as Vertical alignment from the Alignment tab.


Changing Horizontal Cell Alignment using VBA
Now we will use VBA to change the horizontal cell alignment of cells.
Example 1 – Align Center Horizontally ( Active Cell )
The HorizontalAlignment property of cells is used to change the horizontal alignment. It can have three values as xlRight, xlLeft, or xlCenter.
Also Read: How to Indent in Excel ? (VBA)
You can use the following Sub procedure to horizontally align the cell content of the active cell to the center.
Sub alignCenterHorizontallyActiveCell()
'align the text to center horizontally of the active cell
ActiveCell.HorizontalAlignment = xlCenter
'change the interior color of cells
ActiveCell.Interior.Color = RGB(220, 220, 250)
End Sub
Example 2 – Align Right Selected Cell Horizontally
We can change the alignment of selected cells to the Right. We will use the Selection property in VBA to refer to the Selected Cells and then change the HorizontalAlignment Property value to xlRight.
Use the following Sub Procedure to change the alignment horizontal alignment to the right of Selected Cells.
Sub alignRightHorizontallySelectedCells()
'align the text to right horizontally of the selected cell
Selection.HorizontalAlignment = xlRight
'change the interior color of selected cells
Selection.Interior.Color = RGB(230, 200, 250)
End Sub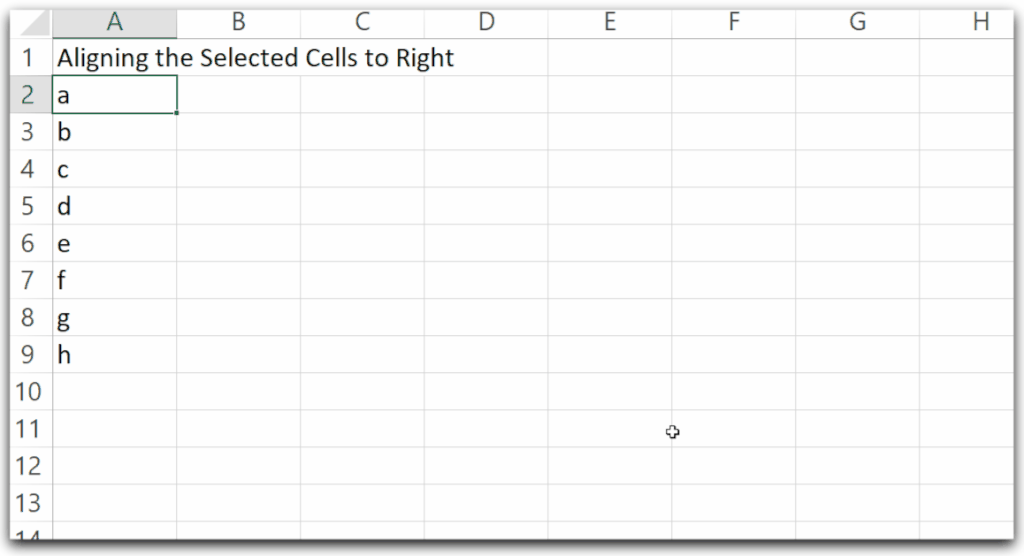
Similarly, we can use the value of the HorizontalAlignment property as xlLeft to left align the cell content.
Vertically Align the Cells using VBA
In this section of the blog, we will learn to vertically align the cells with the help of VBA.
Example 1 – Align Center Vertically the Selected Range
In this example, we will let the user select a range. We have used the Application.InputBox function where we specify the Type argument as 8 to input a Range. We will set the align_range to be the selected range of cells on the worksheet. Thereafter we change the VerticalAlignment property value of the selected Range to xlCenter.
You can use the following sub procedure to change the vertical alignment of selected range to center.
Sub changeVerticalAlignmentOfRange()
'change the vertical alignment of selected range to center
Dim align_range As Range
'select a range using InputBox and set it to aling_range Object
Set align_range = Application.InputBox(prompt:="Select a Range to Align Center Vertically" _
, Type:=8)
'change the vertical alignment of selected range
align_range.VerticalAlignment = xlCenter
'change the interior color of selected range
align_range.Interior.Color = RGB(127, 255, 212)
End Sub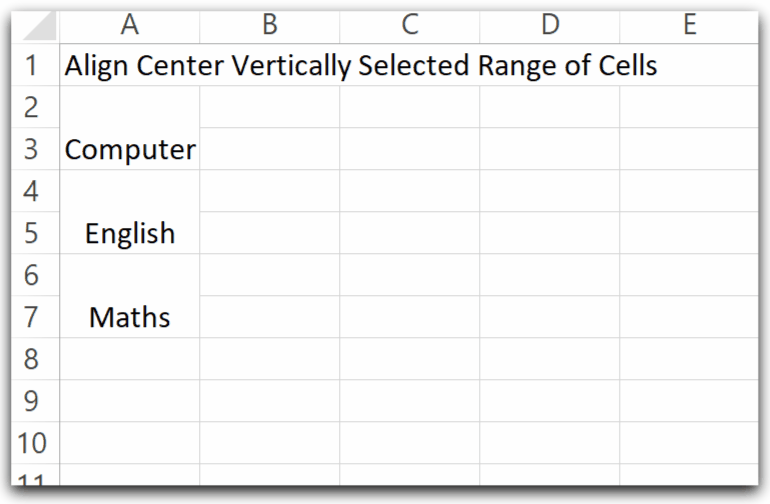
Similarly, you can set the value of VerticalAlignment property to xlTop or xlBottom to align the text to the top or the bottom of the cell.
This brings us to end.
Thank you for reading. ❤